Sunday, December 30, 2012

Merry Christmas and a Happy New Year!

With the holidays rushing up on us I didn't quite have a chance to do a blog post last sunday, so instead I have several recipes I'll share today as one large holiday post! This Christmas we decided to stay here rather than go home for the holidays, it's one of the less fun things about being a military family and having to choose between these things, but we do hope to make the rounds sometime next year. I worked a lot the week before so I hadn't had a chance to do any meals besides crock pot ones, and we did get to try out all of those crock pot meals from that post long ago. The verdict is that all but the teriyaki chicken were great, good flavor, veggies, and for our family made one and a half dinners per bag, but after a week of that I was itching to cook something myself. One thing my husband had been wanting since he got home was venison, and my boss's husband is a hunter and was nice enough to give us a good amount of venison meat to cook up some fun meals with. We got ground, sausage, stew meat and cubed steak. I decided to do one of my favorite dishes using one of my husbands favorites meats: Chicken fried venison steak with sawmill gravy. It turned out great, I had tried making this sort of gravy once before, but I had rushed it too much and it ended up being kinda off, this time it was amazing. To go along with it, my husband had been asking for some sort of a peach crumble, so I decided to do a peach dump cake. It is the easiest dessert I've ever made and it tasted pretty awesome, I might have to keep the ingredients around the house for emergency visitor desserts. So, without further adieu, the recipes.


Chicken Fried "Steak" and Sawmill Gravy


  • 1½ pounds top-round steak (or cubed steak, if you used the cubed skip to the step where you season it with salt and pepper)
  • 1½ cups all-purpose flour
  • 1 teaspoon kosher salt
  • 1 teaspoon black pepper
  • ½ teaspoon cayenne pepper
  • 3 eggs
  • ½ cup buttermilk
  • Vegetable oil, for frying
  • ¼ pound breakfast sausage
  • 2 tablespoons all-purpose flour
  • 1½ cups whole milk
  • Salt and black pepper, to taste

Cut the top-round steak into four pieces. Working with one piece at a time, place on a sturdy cutting board or clean counter-top, cover with a large piece of plastic wrap, and pound the beef with a meat tenderizer until flattened and almost doubled in size (you want the meat to be about ¼-inch thick). Repeat with the remaining pieces. Sprinkle pieces of beef with salt and black pepper. In a large, shallow bowl, whisk together the flour, salt, black pepper, and cayenne pepper. In another large, shallow bowl, whisk together the eggs and the buttermilk. Take a piece of the tenderized meat and dip it in the egg mixture. Next, place the meat in the bowl of seasoned flour. Turn to coat it thoroughly. Place the meat back into the egg mixture, turning to coat. Finally, return it back to the flour mixture, ensuring that it is evenly coated on both sides. Place on a clean baking sheet and repeat with the remaining pieces of meat. In a large, 12-inch skillet, heat ½ inch of vegetable oil over medium-high heat until a small fleck of flour dropped in the pan sizzles. Carefully place one or two pieces of the meat (whatever fits comfortably without overcrowding) into the skillet. Cook for 3 to 4 minutes, or until the blood starts bubbling out of the top of the steak. Using a pair of tongs, gently turn over the steaks and cook for 5 more minutes. Remove the steaks to a cooling rack to drain while you finish frying the remaining steaks. You can place the cooked steaks in a 200-degree oven to keep warm. Finally, make the sawmill gravy. (You can start this in another pan while the last piece of steak is cooking, or do like I did, make it ahead of time and right before the last steak is done cooking, heat it up and add a bit of milk to bring the moisture back to it) In a skillet over medium heat, cook the sausage until browned, crumbling it as it cooks. With a slotted spoon, remove the sausage from the skillet and place on a plate. Drain the oil from the pan, reserving 2 tablespoons in the skillet (if your sausage didn't yield enough drippings, you can use vegetable oil to get to the 2 tablespoons). Sprinkle the flour over the drippings, and whisk together, cooking for about 2 minutes. Add the milk slowly to the skillet, whisking continuously. Reduce the heat to medium-low and continue whisking until the mixture is thickened, about 5 more minutes (Keep going until it's a consistency you like). Remove from the heat, stir in the reserved sausage, and season to taste with salt and black pepper. (If the gravy is too thick, you can thin it by whisking in more milk, a tablespoon at a time.) Serve the steaks with the sawmill gravy poured over top. Next time I will double the gravy recipe because gravy is freaking amazing, and if you like it too I suggest you do the same!


Note: For the buttermilk I used my pre frozen cubes as I never use a full thing of buttermilk. If you have leftovers and want to save it, measure 2 tablespoons in each spot in an ice cube tray and freeze it. Once frozen, put in a zip lock bag and label with whats in it and how much in each cube and put back in the freezer. 4 TB in 1/4 cup and 8 in 1/2, so I used 4 cubes with this.


Peach Dump Cake

(I didn't get a picture of this, it disappeared too quickly!)

  • 24.5 oz jar of sliced peaches in light syrup (or use fresh)
  • 1 package yellow cake mix
  • 1 stick butter (1/2 cup), cut into 16 pieces
  • 1 cup brown sugar
  • 1/2 cup chopped walnuts (optional)
Preheat oven to 350 degrees F. Layer ingredients in a 13 X 9 dish, in order starting with the peaches. Bake for about 40 minutes. Serve warm or cold… with or without ice cream. See? Easy!


Sunday, December 16, 2012

Pumpkin Cinnamon Rolls


With the holidays coming around, one of my husbands favorite things is pumpkin pie, but rather than just have the same thing over and over I wanted to mix things up a bit. And the first attempt at doing so were the Pumpkin Cinnamon Rolls that I made this week. It was also my first time making homemade cinnamon rolls, and while that was quite daunting at first it really went well I think. The recipe is fairly easy to whip together (the hardest part is all of the rolling, but that wasn't too bad) and will definitely be something I might try again for company some time :)


Pumpkin Cinnamon Rolls


(again with the weird photos, I might have to change websites soon)
  • 1 cup canned pumpkin or squash
  • 2 large eggs
  • 2 tablespoons to 1/4 cup lukewarm water*
  • 1/4 cup soft butter
  • 2 1/2 cups unbleached all-purpose flour
  • 1 3/4 cups King Arthur White Whole Wheat Flour
  • 1/4 cup nonfat dry milk
  • 1 tablespoon pumpkin pie spice
  • 3 tablespoons brown sugar, light or dark
  • 1 1/2 teaspoons salt
  • 2 teaspoons Red Star Quick Rise Yeast or instant yeast

*Adjust the amount of water by the time of year or your climate. For summer, or in a humid environment, use the lesser amount of water. In winter, or in a dry climate, use the greater amount. It's always best to start with the lesser amount; you can always add more. (I used the full 1/4 cup of water in my rolls).
  • 3 tablespoons unsalted butter, melted
  • 2/3 cup light brown sugar, packed
  • 1 tablespoon pumpkin pie spice
  • 1/2 cup chopped pecans
  • 4 ounces cream cheese, softened
  • 4 tablespoons unsalted butter, softened
  • 1/4 cup pure maple syrup (I used Grade A)
  • 1/2 cup confectioners’ sugar, sifted (see recipe notes)
  • 1/2 teaspoon pumpkin pie spice

Mix and knead all of the dough ingredients (up to the note on water) together — by hand, mixer, or bread machine — until you've made a soft, fairly smooth dough, it should be fairly sticky, if it isn't, add a couple more tablespoons of water. Place the dough in a lightly greased bowl, cover the bowl, and allow the dough to rise for about 1 1/2 hours, until it's almost doubled in bulk. Turn the dough out onto a lightly greased surface. Roll it into a 14" x 22" rectangle; the dough will be pretty thin. Use a pastry brush to brush the melted butter onto the top of the dough. In a medium bowl, mix together the next 4 ingredients and sprinkle them onto the butter creating an even layer, leaving one short edge free of filling (about 1 inch). Starting with the short end that's covered with filling, roll the dough into a log. Cut the log into nine 1 ½"-thick rolls, it's better if you mark out the cuts before fully cutting through to get them pretty even.
Place the rolls into a lightly greased 9" x 9" pan that's at least 2" deep. Set aside, covered, to rise for 1 hour, or until the rolls look puffy. Bake the rolls in a preheated 375°F oven for 25 to 30 minutes, until they're lightly browned and feel set. Remove them from the oven, and set them on a rack. Turn them out of the pan, and allow them to cool for about 15 minutes. Towards the end of the cooling time, make the glaze. To make the glaze: In a medium bowl with an electric mixer, combine the cream cheese, butter, maple syrup, confectioners' sugar and pumpkin pie spice. Mix on low speed until thoroughly combined and creamy. Feel free to adjust the frosting to meet your needs. If you like a thinner frosting, add in a little milk (start with 1 teaspoon) and slowly increase until you reach the desired consistency. If you want it to be thicker, add in a little more confectioners' sugar.

(another attempt fail)

Sunday, December 2, 2012

Pasta Salad

The last week has been crazy and weird and wonderful, getting used to sharing my home again with my husband. We went to a day of reintegration training together, during which a chaplain got up to give us a talk about learning how to be married again and covered everything but marriage  Up to and including: Schizophrenia, Abortion, Politics and LSD. It was... interesting to say the least, definitely not what I was expecting. I haven't had a lot of time to try out new recipes, but I did get to try out one that I'd been wanting to do for a while that I thought he would love in particular, and it was a great hit. I got this one off of pinterest, and a cold pasta salad really fit in well with the warm weekend we've been having here.


Garden Pasta Salad

(I have no idea what is going on with my photo uploader, every time I tried to upload it there were different colors running through it! It got a bit entertaining after a while, so I included all of the photos)

  • 1-3/4 cups farfalle (bow-tie pasta), uncooked
  • 2 cups small broccoli florets
  • 1-1/2 cups ham steak, chopped
  • 2 cups halved cherry tomatoes
  • 1/4 cup finely chopped red onions
  • 1/4 cup Ranch Dressing
  • 1/4 cup Parmesan Shredded Cheese
  • 1/4 cup chopped fresh dill


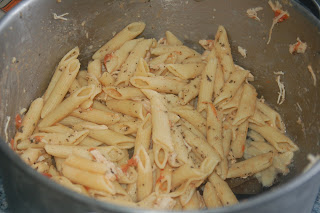
Boil pasta as directed on package, omitting salt and adding broccoli to the boiling water for the last 3 min; (We left our broccoli raw, as my husband likes it better that way) drain. Rinse under cold running water; drain again. Mix ham, tomatoes, onions and dressing together in large bowl. Add pasta; toss to coat and with cheese and dill. The best part about this recipe is you don't even really have to measure it, you can change the ingredient amounts to your liking (or to what you have on hand!) and mix up the veggies as you have available. Enjoy!


Sunday, November 25, 2012

He's home!!

Yesterday evening, after a crazy afternoon of cleaning, hurrying to base, locking my keys in my car, calling what felt like a bazillion locksmiths and finally and losing $60 so we could actually drive home that day, I got to see my husband again. It was exciting, tiring, cold and strange, but such a relief to have the day I waited nearly 9 months for finally arrive. I know I had at first said I was going to stop this when he came back, and my posts may come with less frequency, but I think I will continue with the occasional post. One of my husbands favorite meals, and the first home cooked meal he had after so long, was Shepherd Pie. Growing up, I always thought that Shepherds pie was beef, vegetables, gravy and mashed potatoes, but after hours of watching The Food Network, I found out that wasn't so. Shepherd's pie specifically gets its name because it is made with whats available to shepherds: lamb. When it's made with beef it is actually called Cottage pie, but that's just a name game. I have always made mine with beef, but this time I was determined to get a little fancier, and so I sought out some ground lamb. After visiting and calling almost 10 different places, I finally found a place that carried it, and while it is a quite a bit pricier than beef (nearly $7 a pound) my husband definitely appreciated the change in meat. And for the low down on how to do it traditionally, I went to he always wonderful Alton Brown. Now, on to the recipe.


Alton Brown's Shepherd's Pie


  • 1 1/2 pounds russet potatoes
  • 1/4 cup half-and-half
  • 2 ounces unsalted butter
  • 3/4 teaspoon kosher salt
  • 1/4 teaspoon freshly ground black pepper
  • 1 egg yolk
  • 2 tablespoons canola oil
  • 1 cup chopped onion
  • 2 carrots, peeled and diced small
  • 2 cloves garlic, minced
  • 1 1/2 pounds ground lamb
  • 1 teaspoon kosher salt
  • 1/2 teaspoon freshly ground black pepper
  • 2 tablespoons all-purpose flour
  • 2 teaspoons tomato paste
  • 1 cup chicken broth
  • 1 teaspoon Worcestershire sauce
  • 2 teaspoons freshly chopped rosemary leaves
  • 1 teaspoon freshly chopped thyme leaves
  • 1/2 cup fresh or frozen corn kernels
  • 1/2 cup fresh or frozen English peas

Peel the potatoes and cut into 1/2-inch dice. Place in a medium saucepan, cover with cold water, set over high heat, cover and bring to a boil. Once boiling, uncover, decrease the heat to maintain a simmer and cook until tender and easily crushed with tongs, approximately 10 to 15 minutes. Place the half-and-half and butter into a microwave-safe container and heat in the microwave until warmed through, about 35 seconds. Drain the potatoes in a colander and then return to the saucepan. Mash the potatoes and then add the half and half, butter, salt and pepper and continue to mash until smooth. Stir in the yolk until well combined.

Preheat the oven to 400 degrees F. While the potatoes are cooking, prepare the filling. Place the canola oil into a 12-inch saute pan and set over medium high heat. Once the oil shimmers, add the onion and carrots and saute just until they begin to take on color, approximately 3 to 4 minutes. Add the garlic and stir to combine. Then add the lamb, salt and pepper and cook until browned and cooked through, approximately 3 minutes. Sprinkle the meat with the flour and toss to coat, continuing to cook for another minute. Add the tomato paste, chicken broth, Worcestershire, rosemary, thyme, and stir to combine. Bring to a boil, reduce the heat to low, cover and simmer slowly 10 to 12 minutes or until the sauce is thickened slightly.

Add the corn and peas to the lamb mixture and spread evenly into an 11 by 7-inch glass baking dish. (That's what the recipe seriously calls for, who has an 11x7 baking dish? All I have is a 8x8 or a 9x13, I went with the 9x13 and it just seemed too thin, I'd opt for the 8x8 and just hope it doesn't overflow next time) Top with the mashed potatoes, starting around the edges to create a seal to prevent the mixture from bubbling up and smooth with a rubber spatula. Bake for 25 minutes or just until the potatoes begin to brown. Remove to a cooling rack for at least 15 minutes before serving.


Sunday, November 18, 2012

Thanksgiving!

The holidays will be upon us soon, I had been hoping my husband would be home by then but it's looking like it won't happen, so I will be spending Thanksgiving with some of my friends, and while I won't be cooking a full meal like I usually do, thought I would share some recipes that I usually do when I would be cooking a full meal. We're a turkey family, I'm not a huge fan of ham, so every year since we've been married I've done a full turkey along with the traditional mashed potatoes, green beans, pumpkin pie, stuffing, etc. I have yet to have a turkey flop, and I usually do those for Christmas and once for Easter as well! Mine always turn out flavorful, moist and deliciously brown. I thought I would go ahead and share that recipe, and then the one I'm making this year, which is my sweet potato recipe. I was never a huge fan of sweet potatoes growing up, but I decided to try to do it last year, and instead of using marshmallows on top I did a sort of pecan crumble and I actually loved it! So if you've never liked it before but want to make it, maybe try this version and see what you think :)

Turkey

Butter
Favorite herbs (I use rosemary, thyme, oregano, garlic)
Olive Oil
Salt and pepper
Aluminum foil
Onions
Optional: Celery, Shallots, Garlic, Lemons, etc.

I don't have exact measurements, because quite frankly it depends how big the turkey is that you've bought! So what I do is I put a good amount of butter in a bowl and mix all of the herbs in with it, more herbs more flavor, so don't be afraid to go a bit overboard with it! Once that is done, rinse your turkey off and put it in your roasting pan, and separate the skin from the breasts so you can fit your hand under there. Carefully take hand fulls of the butter and herb mixture and put it under the skin until it's all gone, pushing it to cover the entire breasts and even back onto the top of the legs if you can get it back there.
Once that is done, drizzle the top of the turkey with the olive oil and rub it in so it covers the entire bird and then sprinkle it with a good dose of salt and pepper. For the inside of the bird try to get some salt and pepper along the inside of it, and then cut up one of the onions and whatever other vegetables/fruits you decide to have and put inside the cavity of the bird. Roughly chop the other onion and any of the other vegetables or fruit that you want and put it in the pan under the bird. The more you put in the more flavorful the pan juices for the gravy will be and the more flavorful the bird will be. Once thats done, tent some foil over the bird, making sure to cover the wing tips as those will burn the quickest. Bake at 325 for 15 minutes per pound of bird, taking the foil off when you have a half hour left so you can get a good brown on it.


Sweet Potato Casserole 


  • 4 cups sweet potato, cubed (or same amount of canned yams)
  • 1/2 cup white sugar
  • 2 eggs, beaten
  • 1/2 teaspoon salt
  • 4 tablespoons butter, softened
  • 1/2 cup milk 
  • 1/2 teaspoon vanilla extract

  • 1/2 cup packed brown sugar
  • 1/3 cup all-purpose flour
  • 3 tablespoons butter, softened
  • 1/2 cup chopped pecans

Preheat oven to 325 degrees F (165 degrees C). Put sweet potatoes in a medium saucepan with water to cover. Cook over medium high heat until tender; drain and mash. In a large bowl, mix together the sweet potatoes, white sugar, eggs, salt, butter, milk and vanilla extract. Mix until smooth. Transfer to a 9x13 inch baking dish. In medium bowl, mix the brown sugar and flour. Cut in the butter until the mixture is coarse. Stir in the pecans. Sprinkle the mixture over the sweet potato mixture. Bake in the preheated oven 30 minutes, or until the topping is lightly brown.

I hope everyone has a great holiday season with friends and family, safe travels to those of you travelling and happy cooking!!! :)


Sunday, November 11, 2012

Copy Cat Soup and Breadsticks!

So I realized, after deciding that I was going to slack off a bit until my husband got home that I didn't like that idea one bit! I regretted not doing anything the week before and was determined to change that this week! So, on a bit of a spur the moment idea, I scrounged up some recipes from pinterest and got to it! My husband is not a fan of soup, but I happen to like it a lot, so I decided to try to squeeze in a recipe I was wanting to try for a bit in before he got home. Broccoli Cheese soup is one of my all time favorites, but I'd never made it from scratch before, so I decided to try my hand at that using a Panera copy cat recipe. It really was pretty good and very very easy, but next time I think I might even double the amount of cheese as it didn't really have that cheesy goodness I was looking for. What better to go with soup than bread sticks? And (in my opinion) the best bread sticks come from Olive Garden, so I had a copy cat recipe of that floating around that I tried too. These really were great, they weren't quite as light and fluffy as the ones at olive garden, but they still had a good texture and the salty garlic butter you put over them was mmm to die for! The best part was I had all of the bread stick ingredients just sitting around the house! I don't have pictures right now as I'm in Florida visiting my grandparents, but I will upload them as soon as I'm able :)

(Olive Garden) Bread sticks


  • 1 1/2 cups warm water (between 110 - 120 degrees F) 
  • 1 package active dry yeast 
  • 4 1/4 cups all-purpose flour 
  • 2 tablespoons unsalted butter, melted 
  • 2 tablespoons sugar 
  • 1 tablespoon salt 
  • 1 stick unsalted butter ( I used unsalted)
  • 2 teaspoons garlic powder 
  • 1 teaspoons salt

In a large bowl, dissolve sugar and yeast in warm water and allow to sit for 10 minutes or until mixture starts to get frothy. In separate bowl, combine flour and salt, then add to yeast mixture. Add melted butter and mix with paddle attachment (or hand mix, as I did) until fully combined. Knead dough for a few minutes just until dough is smooth. Grease a cookie sheet and pull off pieces of dough and roll out into strips (It should make roughly a dozen bread sticks, more or less depending on size). Cover the dough and let sit in a warm place for 45 minutes to an hour. Preheat your oven to 400 degrees . In microwave, combine the rest of the ingredients. After bread sticks have cooked for 6 or 7 minutes, brush the bread sticks with half the butter mixture, then continue to bake. Bake for 5-8 more minutes. Immediately upon removal from the oven brush the other half of the butter on the sticks. Allow to cool for a few minutes before eating.


(Panera Bread) Broccoli Cheese Soup


  • 1/2 medium onion, chopped
  • 1/4 cup melted butter
  • 1/4 cup flour
  • 2 cups half-and-half ( or skim milk)
  • 2 cups chicken stock
  • 1/2 pound fresh broccoli ( florets only)
  • 1 cup carrots, julienne
  • 1 teaspoon of salt
  • 1/4 teaspoon nutmeg
  • 1/2 teaspoon pepper
  • 8 ounces grated cheddar cheese

Saute onions in a little butter in a small pan until they get soft and set aside. In a large stockpot melt the butter then add flour and mix for 3 minutes. Slowly add half- half – mixing the entire time followed by the chicken stock. Let simmer on low for 20 minutes before adding broccoli, carrots, onions and cook on low for 25 minutes.Season with salt, pepper and nutmeg. Place soup in a blender or use an immersion blender and puree, I stopped a bit short of it being smooth as personally I love to have some little chunks of vegetables in my soup. Heat soup over low heat and add cheese and mix till melted. Serve and enjoy!

Monday, October 29, 2012

Freezer Meals Part 1

In the endless hours I've spent browsing pinterest (Yes I have a problem!) I've seen many posts talking about freezer meals, and while it's something I'd heard about before I'd never really considered. But after seeing the pictures and the stories I decided it was something I had to try for myself! I picked out a few of the meals that sound the best to try it out, and we'll see how it goes. If they're really good, I might just have to pick up the book "Dinners in the freezer" (not to sound like an advertisement, but it's only $8 on amazon if you're interested). A few tips I learned along the way, first off, don't buy pre-frozen chicken! I don't know exactly what I was thinking, but next time I will buy the regular chicken so it can marinade while freezing and frozen more, but I hope they still turn out alright for me. Also write the directions on the bag before filling it, it's so much easier (I learned this after the teriyaki chicken, so those bags are a bit messy, sorry!). Also I added a bit more meat to each bag than is asked in the recipe because we love meat in this family! I haven't cooked any of these meals yet, I'm saving them for when Nik gets home so I have easy meals that require little cooking, but I fully intend on doing a post after we've tried some with pictures and how we liked them :) The only thing I wish I could change in all of this is my freezer size!

The best way to do this is to buy everything you need and do it all in one go. Cut up all of the veggies, mince the garlic, label the bags, put the meat and veggies in, let out the air, seal, lay flat and freeze! Pull the bags out the night before you want to use them so they can thaw (Or if your fridge works like mine, a few days before you're going to use it!)

Teriyaki Chicken 


  • Medium-Large bag of carrots
  • 1 red onion cut into chunks
  • 2 large cans of pineapple (undrained)
  • 4 cloves of garlic
  • 4 chicken breasts
  • 1 cup of Teriyaki sauce


Split between the two bags, seal, mix, lay flat and freeze. Directions for the bag: Add an additional 1/4 cup of teriyaki sauce to crock pot. Cook low for 8 hours or high for 4, serve over rice.


Sweet and Tangy Meatballs


  • Approximately 36 meatballs (homemade or not)
  • 16 oz grape jelly
  • 20 oz bbq sauce


Split between the two bags, seal, mix, lay flat and freeze. Directions for the bag: Cook on low 2-4 hours, serve over hot rice with a side of veggies.

Sausage and Peppers


(The next two I forgot to get pictures of thawed so I had to pull them out frozen to get a picture)
  • 6 italian sausages
  • 2 green peppers
  • 1 red pepper
  • 1 red onion
  • 4 cloves of garlic
  • 2 cans of italian diced tomatoes
  • 2 T. italian seasoning


Split between two bags, seal, mix, lay flat and freeze. Directions for the bag: Add a drizzle of olive oil, cook on low for 6 hours and serve over noodles or crusty bread with mozzarella cheese.

Savory Chicken


  • 4-6 chicken breasts
  • 2 cans of stewed tomatoes
  • 4 Tbs white wine (or extra chicken broth)
  • 1 large onion
  • 4 garlic cloves
  • 1 cup of chicken broth
  • salt and pepper to taste, 2 bay leaves
  • 4 cups of broccoli (added while cooking, don't put in bag!)


Split between two bags, seal, mix, lay flat and freeze. Directions for bag: Cook on low for 6-7 hours, add broccoli during the last 30 minutes and remove bay leaves before serving.

Sunday, October 21, 2012

Mason Jar Salads

I don't know if it's just me, or if everyone gets like this, but I get tired of the same old thing every week for lunch, so I wanted to mix it up a bit this week. I decided to try out something I saw where they layer salad ingredients in a mason jar in one day, and they're good all week to take to lunch, eat at home, etc. I found three different recipes to try out, but after making them all realized my mason jars were too small! These recipes are rather large, so unless you want to split them up into multiple jars, make sure you get big ones, with wide mouths. All you have to do when you're ready is shake them up and eat! I thought they were all pretty good, but I wasn't a huge fan of the Greek Pasta Salad, but I think that might just be because it had too much mint for my liking. The other two were quite good though, and were a great meal paired with some bread! I might have to try this sort of thing again but mix it up with some different veggies, maybe add some meat or something, and you should too! Just make sure the wet ingredients stay on the bottom, the greens on the top, and separate the two with some veggies so nothing wilts :)

Caprese Pasta Salad


  • 2 tbsp basil pesto (homemade or store-bought)
  • 1 cup cherry tomatoes
  • 1 ½ oz fresh mozzarella, chopped into bite sized pieces
  • 2 oz cooked penne pasta
  • ½ cup fresh spinach leaves
  • ½ cup fresh basil, chopped
Layer as listed, starting with the pesto.


Chickpea Salad


  • 2 tbsp easy lemon vinaigrette (see below for recipe)
  • 1 cup chickpeas
  • ½ cup sun-dried or oven roasted tomatoes
  • ¼ cup spring onion, chopped
  • ¼ cup red onion, chopped
  • ½ cup olives, chopped
  • ½ cup fresh spinach
Layer as listed, starting with the vinaigrette.

Greek Pasta Salad

(Yay! An actually decent food picture, or at least I think so)
  • 2 tbsp easy lemon vinaigrette (see below for recipe)
  • 1 cup cherry tomatoes
  • ¼ cup red onion, chopped
  • 1 cup cucumber, chopped
  • ½ cup feta, crumbled
  • 2 oz rigatoni, cooked
  • ½ cup mixed greens
  • ½ cup fresh mint, chopped
Layer as listed, starting with the vinaigrette.


Easy Lemon Vinaigrette

(will make enough for 3-4 mason jars)

  • Juice from one large lemon
  • ½ cup olive oil
  • Good pinch of salt
  • Couple of grinds of black pepper

Shake all ingredients together in a small container and refrigerate until ready to use. Shake again before using.

Sunday, October 14, 2012

Are you ready for some Football?


It's football season! Regardless of the team you root for, or sometimes even if you're a football fan this probably means some football parties. That usually brings to mind all sorts of classic football foods, dips, chips, wings, etc. and I wanted to try some interesting spins on the classics. The most interesting ones I could find were a White pizza dip and a One pan sticky thai chicken wings. The thai wings do have a bit of a kick just to warn you! I wanted to do some form of dessert for the post too, and as it was my husbands buddy's birthday recently, I decided to bake him up a treat and he requested some Red velvet cheesecake brownies (I sneaked a few, they are amazing! ) so I thought I would add that to the post as well :) Getting down to the tail end of the deployment now and I'm just trying to figure out what all posts I'll be doing, so if anyone has any requests for something please ask!


White Pizza Dip


  • 1 pint grape tomatoes, tomatoes cut in half
  • 1 teaspoon olive oil
  • 1/4 teaspoon salt
  • 1/4 teaspoon pepper
  • 1 1/2 (12 ounces) blocks cream cheese, softened
  • 8 ounces mozzarella cheese, freshly grated
  • 8 ounces provolone cheese, freshly grated
  • 1/4 cup finely grated parmesan cheese and more for garnish
  • 4 garlic cloves, minced or pressed
  • 1/4 cup freshly chopped basil leaves
  • 2 tablespoons freshly chopped thyme leaves
  • 1/2 tablespoon freshly chopped oregano leaves
  • crackers, bread or chips for serving


Preheat oven to 400 degrees F. Line a baking sheet with aluminum foil then place tomatoes on top. Sprinkle with olive oil and salt, then roast for 20-25 minutes, until bursting. Set aside.

While tomatoes are roasting, mix softened cream cheese with about 7 ounces each of provolone and mozzarella, then and parmesan. Stir in fresh herbs, garlic and roasted tomatoes, mixing well to combine. Transfer mixture to an oven-safe baking dish (mine was 6 x 4 round). Sprinkle with remaining provolone and mozzarella. Bake for 25-30 minutes, or until top is golden and bubbly. Serve immediately with crackers, chips or toasted bread. I used dried herbs rather than fresh, as my fresh herbs went bad way too quickly, but it was still pretty good, I really liked it.


Sticky Thai Chicken Wings


  • 2.5 pounds chicken wings
  • 2-3 tablespoons olive oil
  • 1/2 teaspoon salt
  • 1/2 teaspoon pepper
  • 1/2 cup sweet chili sauce (found in the asian area of your grocery store)
  • 1/4 cup rice vinegar
  • 1/4 cup lite canned coconut milk
  • 3 tablespoons brown sugar
  • 3 garlic cloves, pressed or finely minced
  • 1 tablespoon creamy peanut butter
  • 1 teaspoon-sized knob of ginger, grated
  • 1 lime, juiced
  • 1/2 tablespoon soy sauce
  • 1/4 cup chopped peanuts
  • 1/2 cup fresh cilantro
  • 4 green onions, sliced


Preheat oven to 375 degrees F. Pat chicken wings completely dry then season with salt and pepper. Combine chili sauce, vinegar, coconut milk, sugar, garlic, ginger, peanut butter, soy sauce and lime juice, mixing with a fork. Heat a large oven-safe skillet over medium-high heat and add olive oil. Add chicken wings and sear, about 2-3 minutes per side until they get nice and brown. Remove wings and set on a plate, then reduce heat to medium-low. Add chili sauce mixture and bring to boil. Let simmer for 1-2 minutes, whisking constantly. Add wings back into the sauce, tossing to coat. Place skillet in the oven and bake for 25-30 minutes. Remove and spoon the sauce over top of the wings, then garnish with peanuts, cilantro and onions. 

Red Velvet Cheesecake Brownies


  • 1/2 cup butter
  • 2 ozs dark chocolate (coarsely chopped)
  • 1 cup sugar
  • 2 large eggs
  • 1 tsp vanilla extract
  • 1 1/2 tsps food coloring (red)
  • 2/3 cup all-purpose flour
  • 1/4 tsp salt
  • 8 ozs cream cheese (room temperature)
  • 1 large eggs
  • 1/3 cup sugar
  • 1/2 tsp vanilla extract

Preheat oven to 350F. Line an 8- or 9-inch square baking pan with aluminum foil and lightly grease.
Using all but last 4 ingredients: In a small, heatproof bowl, melt butter and chocolate together. Stir with a fork until very smooth. Set aside to cool for a few minutes. In a large bowl, whisk together sugar, eggs, vanilla extract and red food coloring. Add in the chocolate mixture and stir until smooth. Batter should be red. If a brighter red is desired, add an additional 1/2 tsp food coloring. Add flour and salt into the bowl and stir until everything is just combined and no streaks of dry ingredients remain. Pour into prepared pan and spread into an even layer. Last 4 ingredients: Prepare cheesecake mixture. In a medium bowl, beat cream cheese, sugar, egg and vanilla extract until smooth. Drop in dollops onto prepared brownie batter. Gently swirl two batters with a butter knife. Bake for 35-40 minutes, until brownies and cheesecake are set. A knife inserted into the cheesecake mixture should come out clean and the edges will be lightly browned. Cool in the pan completely before slicing and serving, either at room temperature or chilled.

Sunday, October 7, 2012

UK


This week I decided to go British with my menu! I am a huge fan of many british tv shows, including Torchwood, Merlin, Sherlock and last but definitely not least Doctor Who, so I decided to try out some british foods. One I had made and tasted before: scotch eggs, which are a hardboiled egg covered with ground sausage, breaded and fried, but I wanted to try something I had never had before, Toad in a Hole. The name might sound funny, but it's really just sausages baked in a yorkshire pudding, and I got the idea to do it from one of the latest doctor who episodes "The Power of Three" wherein the Doctor says, "Who do you think invented Yorkshire pudding?.... Pudding, yet savory. Sound familiar?". After hearing how he had invented it, well who could resist trying it? ;)

All in all it was a very enjoyable meal, although very very rich and full. I would not suggest cooking all 3 for one meal! Separate them, add a vegetable or salad or something and together it'll make a nice meal :) Enjoy!

Scotch Eggs


  • 1 pound pork sausage meat
  • 2 teaspoons Worcestershire sauce
  • 4 hard-cooked eggs, peeled
  • 1 tablespoon all-purpose flour
  • 1/8 teaspoon salt
  • 1/8 teaspoon ground black pepper
  • 1 egg, beaten
  • 2/3 cup dry bread crumbs
  • 1 quart oil for deep frying

In a medium bowl, mix together the pork sausage and Worcestershire sauce. Combine the flour, salt and pepper in a separate bowl; mix into the sausage.
Divide the sausage into four equal parts (You can try to stretch this farther and do 5 or 6 eggs like I did). Mold each part around one of the hard-cooked eggs, rolling between your hands to shape. Place the beaten egg and bread crumbs into separate dishes. Dip the balls into the egg, then roll in the bread crumbs until coated. Shake off any excess.
Heat the oil in a large saucepan or deep fryer to 365 degrees F (180 degrees C), or until a cube of bread dropped into the oil turns brown in 1 minute. Lower the eggs carefully into the hot oil. Fry for 5 minutes, or until deep golden brown.


Toad in a Hole


  • 1 1/2 cup of all purpose flour
  • 1 scant teaspoon Kosher salt
  • Pinch of freshly ground black pepper
  • 3 eggs, beaten
  • 1 1/2 cup milk
  • 2 Tbsp melted butter
  • 1 Tbsp vegetable oil
  • 1 lb of bangers (an English sausage made with pork and breadcrumbs), or good quality pork or beef sausage links (in casings)

In a large bowl, whisk together the flour with the salt and a pinch of pepper. Make a well in the center of the flour. Pour in the eggs, milk, and melted butter into the well and whisk into the flour until smooth. Cover and let stand 30 minutes. Coat the bottom and sides of an 8x12 or 9x9 casserole dish with vegetable oil (we use high smoke point grapeseed or canola oil). Place a rack in the bottom third of the oven and put the empty dish on the rack. Preheat the oven with the dish in it to 425°F. While the oven is coming to temperature, heat a tablespoon of vegetable oil in a skillet on medium high. Add the sausages and brown them on at least a couple sides. When the sausages have browned, and the dish in the hot oven, pull the oven rack out a bit, put the sausages in the casserole dish, and pour the batter over the sausages. Cook for about 20-30 minutes or until the batter is risen and golden. Enjoy!


Sunday, September 30, 2012

Fondue!

This weeks recipes I tried out last week when my friend Brit visited to celebrate my 22nd birthday! I thought, rather than spending tons of money to go out to a fancy fondue place, we could spend less, stay in and do our own :) It turned out amazingly, tasted so good and was a great fun time. Feel free to experiment with the cheeses or chocolates, we tried adding some gouda after we tried the recipe and it was great! Lets face it, nearly everything tastes good dipped in either cheese or chocolate!


Cheese Fondue


  • 1/2 pound imported Swiss cheese, shredded (We used Monterey Jack instead)
  • 1/2 pound Gruyere cheese, shredded 
  • 2 tablespoons cornstarch
  • 1 garlic clove, peeled
  • 1 cup dry white wine
  • 1 tablespoon lemon juice
  • 1/2 teaspoon dry mustard
  • Pinch nutmeg
  • Assorted dippers (Crusty bread, Broccoli, Sausages, Apples, anything that tastes good in cheese, and you'd be surprised on how good the apples go with it!)
In a small bowl, coat the cheeses with cornstarch and set aside. Rub the inside of the ceramic fondue pot with the garlic, then discard. Over medium heat, add the wine and lemon juice and bring to a gentle simmer. Gradually stir the cheese into the simmering liquid. Melting the cheese gradually encourages a smooth fondue. Once smooth, stir in mustard and nutmeg. Spear dippers with fondue forks or wooden skewers, dip, swirl and enjoy!


Milk Chocolate Fondue


  • 2/3cup half-and-half
  • 12oz milk chocolate or 1 bag (11.5 oz) milk chocolate chips
  • Dippers (pound cake cubes, strawberries, pineapple chunks, apple slices, marshmallows)
  • Optional: You can add a few tablespoons of liquor if you want to make it an adult party, Orange Liquor, Amaretto, etc.

In 2-quart heavy saucepan, heat half-and-half and chocolate over low heat, stirring constantly, until chocolate is melted and mixture is smooth; remove from heat. Pour into fondue pot or chafing dish. Spear Dippers with fondue forks; dip into fondue. (If fondue becomes too thick, stir in a small amount of half and half)

Sunday, September 23, 2012

Breads n stuff

I love to bake, I'm really not all that great at it but I love to do it and this week I decided some baked goods would be amazing so I did an oldie (but a good one!) and tried something new. I made Cinnamon Pecan Twists with maple glaze, a much loved pastry in my family, and tried a recipe for french bread off pinterest. The french bread didn't turn out so great, but I didn't knead it all that much so I wonder if it might do better with more of that. It had a decent taste and was alright, considering it only took an hour to have fresh baked bread in my house :) This weekend I also had an early birthday weekend with my best friend Brit, and we had amazing fondue, which I will share pictures and recipes with next week :D for now, bread.

Cinnamon Pecan Twists with Maple Glaze


  • 1/2 cup finely chopped pecans
  • 3 T sugar
  • 1 t cinnamon
  • 1/8 t nutmeg
  • 2 cans Pillsbury refrigerated crescent dinner rolls
  • 2 T margarine or butter, melted
  • 1/2 cup powdered sugar
  • 1/4 t maple extract (I use maple syrup, not quite as strong but easier)
  • 2-3 t milk
Heat the oven to 375 degrees and grease down one large or two small cookie sheets. In a small bowl combine the first 4 ingredients, mix well. Unroll both cans of dough, separate into 8 rectangles and firmly press the perforations to seal. Brush each rectangle with the melted butter and sprinkle with 1 tablespoon of the pecan-sugar mixture. Starting at the long end roll up each rectangle and pinch the edges to seal. Using a sharp knife, cut one roll in half lengthwise forming 2 strips. With the cut side up, carefully overlap strips 2 times to form twist (a picture of the process is at the end). Press the edges to seal and place on the sprayed cookie sheets. Repeat with remaining dough and sprinkle with any remaining cinnamon-pecan mixture. Bake for 10-15 minutes, or until golden brown. While cooking, combine the last 3 ingredients in a small bowl, adding enough milk for desired drizzling consistency. Drizzle over the warm rolls and serve!

(step by step, rolled, cut, open and twist!)


Quick French Bread


  • 2 1/2 Cups Warm Water
  • 2 T. Yeast
  • 2 T. Sugar
  • 1 t. Salt
  • 3 T. Oil
  • 5 1/2 -6 Cups Flour


Sprinkle the yeast and sugar over a bowl of the warm water. Let it sit for about five minutes until you see the yeast get all bubbly on top. Stir in the salt, oil, and flour. Knead the dough for a few minutes until it is smooth and pulls away from the bowl. Then cover your bowl with a warm wet towel and let the dough sit for about 15 minutes. You can turn your microwave on for two minutes and set your bowl of bread dough in the warm microwave for the 15 minutes. This warm envirmonment makes the bread rise a lot faster. Next, divide the dough into two long loaves. Place both loaves side by side on a greased cookie sheet. Then take a knife and slash the tops of each loaf diagonally. Allow the loaves to sit for a few minutes while you preheat your oven to 375. Bake for 30-35 minutes until golden brown. For an extra cruchy crust, mix together one egg white with 1 T. cold water and brush on cooked bread and cook for another 3 minutes, but I found that my oven gave me a good crispy crust.

Monday, September 17, 2012

Eggs Benedict and Excuses

My dad was a drill sergeant, and always used to say to me "Whats the effective range of an excuse?" with the proper answer being "0 meters drill sergeant", so I'll keep this short. Our house got infested with fleas, it was bad and I took this weekend as the chance to get rid of them once and for all. It'll be a while yet til I know if it worked, but it took up a good chunk of my weekend picking all the stuff up, cleaning my house and then waiting outside of it while the bombs did their work, but enough of that! I wasn't able to get to everything I wanted to do this weekend, but I do at least have one recipe for you! I wanted to revisit breakfast and try some new things. My husband loves eggs benedict, and I have never made them before, so I decided to try to do that. I made my own Hollandaise sauce, and honestly? I wasn't a huge fan. It took forever to make and I wasn't impressed with the flavors I got from it. I included the recipe here but really I'd suggest you just do the sauce from a pack, much easier and I enjoy it more myself. I promise next week I'll have a full post, and will hopefully make up for this mess!

Eggs Benedict


Poached Eggs:
  • 4 quarts water
  • 1/4 cup white vinegar
  • 1 teaspoon kosher salt
  • 8 large eggs
Put 4 (6-ounce) custard cups in a 6-quart pot. Add 4 quarts of water or enough to cover the cups by at least 1/4-inch. Add the vinegar and salt to the water and put the pan over high heat. Heat just until the water begins to boil and the cups clatter against the bottom of the pan, 20 to 25 minutes. Adjust the heat to keep it simmering and steaming without the rolling boil. Break the eggs, 1 at a time, into another custard cup or ladle. Pour the eggs slowly into each of the cups, timing them about 10 seconds apart. Cook for 5 minutes each. Serve immediately or remove eggs from cups and transfer to an ice bath to stop cooking. Refrigerate for up to 6 hours in the ice bath. To reheat, bring water to a simmer, turn off the heat and add the eggs. Wait 1 to 2 minutes or until warmed through. You can do it without the cups, but they help keep the eggs in place and help prevent the eggs ripping open.


Hollandaise Sauce:
  • 3 large egg yolks
  • 1 tablespoon water
  • 1/4 teaspoon kosher salt
  • 1/2 teaspoon ground cayenne, divided
  • 3 to 4 tablespoons freshly squeezed lemon juice strained, divided
  • 8 ounces cold unsalted butter, cut into tablespoon-size pieces
  • 1/4 teaspoon sugar
Whisk together the egg yolks, water, salt and 1/4 teaspoon of the cayenne in a small saucepan for 1 minute. Put the saucier over low heat and whisk vigorously, moving the pan on and off the heat every 10 to 15 seconds, for approximately 3 minutes. Add 1 piece of butter at a time, every 30 seconds, while continually whisking and moving the pot on and off the heat. Once half of the butter, or 8 pieces, have been added, add 1 tablespoon of lemon juice. Add the remaining 8 pieces of butter, 1 at a time, every 30 seconds, while continuing to move the pot on and off the heat. After the last piece of butter has been added, add the remaining 1 tablespoon of lemon juice, the remaining 1/4 teaspoon cayenne, and the sugar and whisk for 1 to 2 minutes. Taste and add more lemon juice, as desired. Move immediately to a short, wide-mouthed thermos to hold for up to 2 hours. Reheat over low heat for 45 seconds.

To assemble: 
  • English muffins
  • Poached eggs
  • Hollandaise sauce
  • Ham or Canadian bacon
Toast the english muffins or place under the broiler until brown and a lil crispy. Fry up the ham or bacon until warmed through and browned a bit. Layer starting with the english muffin, ham, egg and then top with the hollandaise sauce and enjoy! We love these in our house, hopefully you like them too!


Sunday, September 9, 2012

Pasta and creme brulee!

This week is a pretty random week, I was really busy with work and getting sick, again (the joys of working with children) so I decided to go with a favorite in my house, and something really easy and quick to do. The original recipe calls for grilled chicken, but I love to do my oven roasted chicken, so I used that instead, and I much prefer that flavor for it, but feel free to use grilled chicken if you want. For my oven roasted chicken, I just take skinless boneless chicken breasts, rub them in olive oil and season them with salt and pepper (and garlic powder sometimes, as we're a big garlic family) wrap them in tin foil and bake them in a 350 degree oven for about an hour. I wanted to try something fun for dessert to go with it, and am a big fan of creme brulee so I decided to brave that out an see how it went. It turned out so delicious, so smooth and creamy!


Chicken Penne Al Fresco


  • 4 garlic cloves, peeled and sliced
  • 2 cups grabe or cherry tomatoes
  • 3 cups uncooked penne pasta
  • 3 cups chicken broth
  • 3/4 cup dry white wine
  • 1/2 t salt and pepper
  • 1 1/4 cup lightly packed fresh basil leaves coarsely chopped
  • 1 oz parmesan cheese, grated
  • 2 cups diced grilled (or oven roasted) chicken breasts
Fill large pot with chicken broth and wine, bring to a boil before adding pasta, cook until the pasta in tender, and keep all the remaining liquid in the pot, do not drain! While the pasta is boiling, in a microwave safe bowl, put the sliced garlic, tomatoes, and drizzle it all in olive oil. Microwave on high for 4-5 minutes, stirring well after 2. Crush the tomatoes and add to the cooked pasta and liquid, adding the salt and pepper as well. Add the chicken, basil and cheese, reserving a bit of the cheese and basil for a garnish if you'd like. Mix well and serve.

Creme Brulee


  • 1 quart heavy cream
  • 1 vanilla bean, split and scraped
  • 1 cup vanilla sugar, divided
  • 6 large egg yolks
  • 2 quarts hot water


Preheat the oven to 325 degrees F. Place the cream, vanilla bean and its pulp into a medium saucepan set over medium-high heat and bring to a boil. Remove from the heat, cover and allow to sit for 15 minutes. Remove the vanilla bean and reserve for another use. In a medium bowl, whisk together 1/2 cup sugar and the egg yolks until well blended and it just starts to lighten in color. Add the cream a little at a time, stirring continually. Pour the liquid into 6 (7 to 8-ounce) ramekins (I used bowls and just kicked up the cooking time). Place the ramekins into a large cake pan or roasting pan. Pour enough hot water into the pan to come halfway up the sides of the ramekins. Bake just until the creme brulee is set, but still trembling in the center, approximately 40 to 45 minutes. Remove the ramekins from the roasting pan and refrigerate for at least 2 hours and up to 3 days. Remove the creme brulee from the refrigerator for at least 30 minutes prior to browning the sugar on top. Divide the remaining 1/2 cup vanilla sugar equally among the 6 dishes and spread evenly on top. Using a torch, melt the sugar and form a crispy top. Allow the creme brulee to sit for at least 5 minutes before serving. If you don't have a torch, like me, I used the broiler setting on my oven and just put it in for a few minutes, it doesn't have the same effect but is still tasty.

Monday, September 3, 2012

Salad and Sandwich

I was originally thinking about doing a soup and salad for this week, but realized it's still hot at least in my part of the world, and soups are, in my opinion best saved for a chilly day. So I decided to do one of my favorite salads that I had done before for some company, a walnut and pear salad with a home made honey dijon dressing. For the sandwich I thought over a few options, and decided on a Louisiana specialty, the Po' Boy. It's usually made with either roast beef or a fried seafood filling, and I decided to go with the shrimp. I'm not a huge fan of shrimp but on this sandwich it worked out really well, I really liked it!

Walnut and Pear Salad


(I have no idea why my computer won't load this photo the right way up, too sick to fight with it right now lol)
  • 2 t butter
  • 2 T liquid honey
  • 1/2 t ground allspice
  • 1 1/2 cups walnut pieces
  • 1/3 cup olive oil
  • 1/4 cup red wine vinegar
  • 3 T liquid honey
  • 2 t dijon mustard
  • 1 t ground ginger
  • 1/4 t salt
  • 1/4 t pepper
  • 6 cups spring mix lettuce
  • 2 Large unpeeled pears, thinly sliced
  • 1/2 cup grated smoked gouda cheese
Combine the first 3 ingredients in a small frying pan. Heat and stir on medium heat until the butter is melted. Add the walnuts and heat and stir until bubbling and golden. Transfer to greased baking sheet and let stand for about 30 minutes, stirring occasionally, until cool. Combine the next 7 ingredients (olive oil through pepper) in a container with a tight fitting lid and shake well. To put the salad together, put the lettuce into a large bowl and toss with half of the dressing. Spoon the lettuce mixture onto 6 plates. Arrange pear slices over lettuce in a fan shape and sprinkle with cheese and walnuts. Drizzle with the remaining dressing and enjoy!

Shrimp Po' Boy Sandwich


  • 1 pound medium shrimp, shelled, deveined and with tails removed
  • 3/4 cup fine cornmeal
  • 3/4 cup flour
  • 1 Tbsp Cajun seasoning
  • 1 teaspoon salt
  • 2 eggs, beaten
  • Peanut oil for frying (or really any kind of oil)
  • 1/2 head iceberg lettuce, shredded
  • 2-3 tomatoes, sliced about 1/4 inch thick
  • 4 small French sandwich rolls
Remoulade Ingredients:
  • 1/4 cup mustard, preferably Creole mustard
  • 1 1/4 cups mayo
  • 1 teaspoon pickle juice or vinegar
  • 1 teaspoon hot sauce (Crystal, Tabasco, etc)
  • 1 large garlic clove, minced and smashed
  • 1 Tbsp sweet paprika
  • 1-2 teaspoons Cajun seasoning

Mix all of the remoulade ingredients in a bowl before hand and set aside for 30 minutes or so, as the sauce gets better over time. Pour enough peanut oil in a large frying pan to come up about 1/4 inch, and set the pan over medium-high heat until a small amount of flour sizzles immediately when you drop some in. Mix the cornmeal, flour, Cajun seasoning and salt in a large bowl. Working with a few at a time, dredge the shrimp in the egg, then in the cornmeal-flour mixture. Shake off any excess and fry until golden on both sides, about 2 minutes total. Set the fried shrimp aside on paper towels to drain. To assemble the sandwich, slice the sandwich loaves almost all the way through and smear remoulade on both the top and bottom. Lay down a layer of shredded lettuce on the bottom of the sandwich, then arrange the shrimp on top. Lay 3-4 slices of tomato on the shrimp and press the top of the bread down on the bottom, compressing the sandwich a little. Serve at once with hot sauce and a beer. (My favorite suggestion!)

Sunday, August 26, 2012

Cupcakes!

My husbands birthday is coming up in a couple short weeks, and for his birthday I wanted to send him something special, something homemade, but wasn't entirely sure what would survive the journey over there. Originally I had debated making him pies in a mason jar, as I saw the idea on pinterest, but after talking to him realized that they have pies available where they eat dinner, so I brainstormed some more. I finally found these amazing recipes for adult cupcakes and decided that it would be a great birthday treat if I could bake some in mason jars! While I was at it, I wanted to try this champagne cupcake recipe that I had seen on pinterest as well that I thought looked good. At first glance, each of these recipes used a box mix, and there's always a stubborn part of me that says as good as box mixes are, scratch has to be better. So my original plan was to try both the scratch and box versions of these cupcakes, but time got away from me, and after doing the scratch and box versions of the champagne cupcakes and finding I enjoyed the box versions better, decided to settle on the box version for the second. Feel free to try them both out yourself and make your decision though! I gave my neighbors a bit of each and they enjoyed the scratch version better, so maybe it's just me. Either way, here they all are for your experiments and enjoyment :)

Pink Champagne Cupcakes (from scratch)

 (The cupcakes side by side, cut open so you can see how similar they are. At the top is the box mix, bottom is the ones from scratch.)

  • 2 3/4 cups all-purpose flour
  • 3 teaspoons baking powder
  • 1 teaspoon salt
  • 2/3 cup butter
  • 1 1/2 cups white sugar
  • 3/4 cup champagne
  • 6 egg whites
Preheat oven to 350 degrees F and line cupcake tins with liners.
In a large bowl, cream together butter and sugar until very light and fluffy. Sift flour, baking powder, and salt together, and then blend into creamed mixture alternately with champagne. In a large clean bowl, beat egg whites until stiff peaks form. Fold 1/3 of the whites into batter to lighten it, then fold in remaining egg whites. Pour into cupcake liners. Bake at 350 degrees F for about 18 minutes or until toothpick inserted in center comes out clean. I can't remember the exact time, as I just did the same amount of time as the box called for on the box mix.


Pink Champagne Cupcakes (from box)


  • 1 box white cake mix
  • 3 egg whites
  • 1 1/4 cup pink champagne
  • 1/3 cup oil
  • 3 or 4 drops red food coloring

Mix together and bake according to the directions on the box.


Salted Buttercream Frosting


In a bowl combine butter, sugar and salt. Beat till blended. Add the milk and vanilla and beat for an additional 3 to 5 minutes or until smooth and creamy. If you don't have a wide enough tip on your icing bag, just use none at all and you'll get the look like mine do, and if you don't have an icing bag feel free to use a zip lock bag with one corner snipped out :)
Bailey's Chocolate Caramel Cupcakes

(Tip: Don't frost and decorate them while in the cupcake pan still. Makes for a mess! Ooops)

  • 1 Duncan Hines Moist Deluxe Dark Chocolate Fudge Cake Mix
  • 3 Large Eggs
  • 1/2 cup melted butter (butter not margarine)
  • 2/3 cup milk
  • 1/3 cup Bailey's Irish Cream
  • 10 ounces Bitterweet Chocolate, finely chopped
  • 3.5 ounces caramels (about 10-12 candies unwrapped)
  • 1 cup heavy whipping cream
  • 1 cup shortening
  • 1 tsp vanilla extract
  • 8 cups Powdered Sugar
  • 1/3-1/2 cup Bailey's Irish Cream
  • 1/4-1/3 cup Heavy Whipping Cream
  • Caramel Syrup
For the Bailey's Chocolate Fudge Cupcakes:
Preheat oven to 350. Using a large mixing bowl, add cake mix, eggs, butter, Bailey's and milk and mix on low until combined. Then mix on high for 2 minutes. Pour batter into paper lined cupcake pans. Bake for 20 min. Cool completely.
For the Chocolate Ganache:
Place chopped chocolate in medium bowl and set aside. Using a medium sauce pan, heat whipping cream and caramels over medium-low heat, stirring occasionally, until the caramels have melted completely.
Pour caramel cream over chocolate and stir until melted.
For Bailey's Buttercream:
In large mixing bowl, cream shortening and vanilla for 2-4 minutes. Add in powder sugar, one cup at a time
Combine Bailey's with cream in measuring cup and slowing add to sugar mixture, using more cream for a creamy consistency, use less milk for a stiff consistency.
To Assemble:
Using a sharp knife, cut out a cone shaped section of the cupcake and set it aside setting next to each   cupcake. Fill Cupcake holes with ganache, and place cake back over hole. Top cupcakes with buttercream.
Garnish with remaining ganache and caramel syrup. (just remember there is uncooked out alcohol in these!)


(Mason jar cupcakes! Accidentally put in too much batter, so not enough room for all of the frosting but I think he'll still like them :) )

Enjoy!


Monday, August 20, 2012

Tardy!

I wondered how long it would take.. I have been very good in getting a post up every Sunday, even through vacations, and yet this would be the week I forget. In my defense, I was gone almost all weekend on a marriage retreat and I started a new job last week so things have just been a bit crazy around my house. I will try to not let it happen again!

This week I did sushi! I've sorta done it before with my in laws once, and a few months ago my mother in law sent me a bunch of stuff for it, including pickled ginger, wasabi, and the nori wrappers. I'd been wanting to try them for a while, and finally had an excuse for it! One of the things I very much so didn't want to do was work with raw fish, I know there are proper ways to do it, but it just makes me so nervous! So I went with a few of the simpler ones, a spicy tuna roll, philadelphia roll, and a california roll. If you're trying this for the first time, or have kids you're worried about liking everything, try the tuna roll and go from there. All in all it turned out very well and I started to get the knack of rolling them! Don't worry if they aren't too pretty at first, it takes a while to get the hang of it :)

Sushi Rice


  • 3 cups uncooked short grain rice (not minute!)
  • 3 cups water
  • ½ cup rice vinegar
  • ½ cup sugar
  • 1 teaspoon salt

Wash the rice and rinse thoroughly. Place rice and water in a rice cooker and set until cooked. Alternately, place rice and water in a medium saucepan. Bring to a boil over high heat, reduce to a simmer, and cook covered until done, 35 to 45 minutes.
Meanwhile, mix together the rice vinegar, sugar and salt in a small saucepan; cook over medium heat until sugar has dissolved. Allow to cool. Put the cooked rice into a large mixing bowl; pour the vinegar sauce over the hot rice and mix. Allow to cool slightly before using in sushi recipes.


Spicy Tuna Roll


  • 1 cup of cooked Sushi Rice
  • 1 (6 oz) can solid white tuna in water, drained
  • 1 Tbsp mayonnaise
  • 1 tsp chili powder
  • 1 tsp wasabi paste
  • 4 sheets nori
  • ½ c. cucumber, julienned
  • 1 carrot, julienned
  • 1 avocado, peeled, pitted and diced

In small bowl combine tuna, mayonnaise, chili powder and wasabi paste. Break up tuna into small flakes and make sure all ingredients are combined.
Cover a bamboo sushi mat with plastic wrap and lay a sheet of nori, rough side up, on wrap. Firmly pat a thick, even layer of rice over nori. Place 1 Tbsp of cucumber, carrot and avocado in a line along the bottom edge of the sheet, and spread a line of tuna mixture alongside the vegetables.
Pick up edge of nori up , fold the bottom of the nori up , enclosing the filling and tightly roll the sushi into a thick cylinder. Once the sushi is rolled, wrap in the mat and gently squeeze to seal. Cut each roll into 6 pieces and refrigerate 2 hours or until ready to serve. Repeat until all ingredients are used. If you don't have the mat, don't worry, I just rolled mine up on a cutting board. It's a bit messier but it works :)


California Roll


(a good example of how to put everything together so it rolls up nicely)
  • 1 cup sushi rice
  • 8 nori seaweed sheets
  • 2 tablespoons sesame seeds
  • ½ cup imitation crab meat, finely chopped
  • 3 tablespoons mayonnaise
  • 1 avocado, peeled, thinly sliced lengthwise
  • ½ cucumber, peeled, cut into long, thin matchsticks
Combine the crab meat and mayonnaise in a bowl, and then put together the roll the same way as the tuna roll was done, sprinkling the rice with the sesame seeds before adding the rest of the ingredients.


Philadelphia Roll

(Forgot to get pictures of this one, sorry!)


  • 8-ounce block cold cream cheese, cut into long, thin sticks
  • 1 cup cooked sushi rice
  • 4 ounces smoked salmon, thinly sliced
  • 2 nori seaweed sheets
  • 2 green onions, thinly sliced

Roll together the same way as the other rolls and Enjoy!