Friday, June 6, 2014

Desserts - Ice Cream and Baked Apples

So this might be a little more of a fall post, but sometimes it's not the season and you just want a taste of fall! I had this post floating around my pinterest for a while and it just looked drool worthy, and when I had to pick a somewhat healthy dessert, I picked this baked apples recipe. It's super simple, so easy to throw together your kids could help with it, and delicious. And what are baked apples without ice cream? I'd had the ice cream attachment sitting around for my kitchen aid for a long time, but had never used it! So I found this great simple recipe, got the ingredients, let it sit in the freezer (make sure it's for a good couple days), and had that to go with it. It turned out delicious, the apples are wonderful, with a little cinnamon sweetness to go with it, baked just long enough to keep a lil crunch with it but still be warm and a little softer. The ice cream was good, though it was a little sweet to me, I think next time I might use less sugar. The first batch I did was vanilla, but feel free to mix it up! I have another batch in the freezer right now of Chardonnay ice cream. It set up and the batter tasted good, we'll see how it tastes frozen with the apples tonight! It's so easy to do ice cream, and cheaper! The recipe calls for heavy cream, but I substituted half and half, partly because it's cheaper, and partly because it's lower fat and healthier, and it turned out great. Feel free to play with the ingredients a bit, fat free milk, mixers, etc. and let me know how it turns out! Alright, so on with the recipes.


Baked Apples with Oatmeal Streusel Topping

  • 1/4 cup butter
  • 1/2 cup oats
  • 1/2 cup flour
  • 1/2 cup brown sugar
  • 1 t cinnamon
  • pinch of ground ginger and salt
  • 3-4 apples
Preheat your oven to 350, and melt the butter and mix it with the rest of the streusel toppings. Halve the apples and scoop out the seeds and stem areas, then fill them with the topping. Place in a dish and bake until the apples start to swell and the topping starts to brown, or roughly 30 minutes. Enjoy!
http://nonrecipe.blogspot.ca/2012/03/baked-apples-with-oatmeal-streusel.html

Simple Vanilla Ice Cream

  • 2 cups heavy whipping cream
  • 1 cup milk
  • 3/4 cup granulated sugar (I'd take it down to 1/2)
  • 1 T vanilla (the higher quality the better)
  • pinch of sea salt (optional, but believe me, it's good)
If you are using a kitchenaid, make sure you put the attachment into the freezer at least a couple days before hand. Personally, I leave it in there in between batches, then it's ready when I run out. Stir all the ingredients in a bowl and mix until the sugar is dissolved, then assemble the ice cream machine and pour the cream mixture into it. Turn it on a low speed and let sit until it starts to form a sort of slushie texture or longer. That's how long I let mine sit, and it takes roughly 10-15 minutes, but don't get impatient! Spoon it into an airtight container and let sit in the freezer 4+ hours, if not overnight. It'll be loose before then, but still edible. 
http://www.simplyscratch.com/2013/05/vanilla-ice-cream-from-laurens-latest-new-ecookbook.html


Saturday, May 31, 2014

Ratatouille!

Been a while, but I'm baack. Life threw me for a loop while I was gone, but I'm back in the swing of cooking and ready for some more posts! There isn't going to be much of an order to these, or a posting deadline, but it'll be updated more often than it was in the last couple months ;)

One of the dishes I made during my healthy eating spree (which is fairly over now, back to my comfort foods) is ratatouille, and I had enough of the ingredients left over to make it again, this time getting some pictures so you can all can see how pretty it is! Now most of these ingredients aren't totally in season yet, if you don't have a garden and grow them yourselves you can still buy them, just a little more expensive right now. If you want to try it though, keep it for later when they're cheaper! The sauce on the bottom is amazing for dipping, or if you double it, you could save what's left for later and put it on pasta, with all those awesome veggie tastes in it.

I got this recipe off a site called http://www.budgetbytes.com/ which is wonderful and has a ton of awesome recipes, including this one. Check it out if you get some time, lots of options and she prices down everything for you, focusing on budget friendly meals.

Oven Baked Ratatouille


  • 1 cup marinara sauce 
  • 1 small yellow onion 
  • 1 small eggplant 
  • 1 medium zucchini 
  • 1 medium yellow squash
  • 3 medium roma tomatoes 
  • Pinch of salt and pepper 
  • ½ tsp dried basil 
  • ½ tsp dried oregano 
  • 1 cup shredded mozzarella

Preheat the oven to 400 F. Spread 1/2 cup of the marinara along the bottom of a pie plate, reserving the rest for later. Thinly slice your onion and sprinkle it over the marinara. Thinly slice the rest of the vegetables, halving or quartering the ones that are thicker, as you're aiming for a similar sized slices, both thickness and diameter (Math terms in cooking, yuck). Layer them in the pan, starting from the outside and working your way in, alternating vegetables to form a pattern. Great for sight as well as making sure everyone gets a little bit of everything in each bite. Sprinkle the top with the seasonings (you can also just use italian seasoning) and the remaining marinara sauce. Cover with foil and bake for 30 minutes. After that point, remove the foil and sprinkle the cheese on top, then return to oven and cook for 10-15 more minutes, making sure the cheese doesn't get too dark!

This is wonderful, it ends up being almost like a veggie crustless pizza with the sauce and cheese and spices. I'm not a huge veggie fan, but the sauce and cheese definitely help to cut down on that Ewww veggie feeling, and I really enjoyed it. A wonderful summer side and it looks BEAUTIFUL in the pan if you're having company over!

Friday, April 11, 2014

I have a confession to make

I like to fancy myself a great planner and everything, but the very sad truth is that I am miserable at it. I try my best but sometimes I just have these great epic fails that just... don't work. I know I said I wouldn't miss another day and I'm sure you all noticed that I missed... well a lot. Here is my lovely planning snafu (am I spelling that right? I love that word). So I planned this 30 days of bacon thing, got so excited, gathered up all these awesome recipes I was determined to try! Shortly after that, I heard about this awesome shake replacement plan, and decided to give it a try and do this healthy eating, meal replacement, work out thing and try to get fit and strong and just see where I could push my body. Well the lovely thing about that is it started this week, and healthy and bacon just don't. quite. work.

I hemmed and hawed and overall just avoided this subject but I needed to tackle it so here it is! I have one more recipe left that I tried to share, so I'll start adding that, but otherwise I'm afraid all I'm going to have are healthy recipes! Sorry to disappoint, but sometimes, life happens! If you stick with me I do have some good healthy recipes, they're just going to be coming in less frequent as I just can't eat that much that fast by myself! Otherwise, if anyone wants to guest blog a bacon recipe before it's over just holler :) I'm more than happy to hear what other people are doing with that wonderful ingredient!

Alright, luckily for us, I ended it with an amazing ingredient. Really this one was such a big hit, but how could I go wrong? Chicken, cheese, bacon, green onions, it's delicious and everyone adored it. Make it if you can, because it's sure to be a staple at your house after this!

Bacon Wrapped Cream Cheese Stuffed Chicken


  • 2 boneless skinless chicken breasts
  • 4 T cream cheese, softened
  • 1/4 cup shredded pepperjack cheese
  • 2 T diced green onions
  • 4-8 slices of bacon
  • pepper, to taste
Preheat the oven to 375 F. Cut the chicken into 4 equal pieces, preferably not just flat in half, if you sort of butterfly it, it'll go better, because we're going to flatten the chicken so it's about 1/4 inch thick. Mix together the cream cheese, pepperjack and green onions, and put 1/4 of the mixture down the middle of each chicken breast. Roll the chicken breast up, keeping the mix in the middle, and wrap in the bacon, using more or less bacon depending on the size of the bacon and the chicken breasts. Secure with a toothpick if needed, and sprinkle with some pepper, depending on how much you like. Place on a baking sheet and bake for 30 minutes, broiling the top for 5 minutes after that until the bacon is crisp and brown, and then turn it upside down and broil an additional 3-5 minutes to crisp up the bottom so you don't get stuck with soggy bacon. Serve immediately and enjoy! 


Monday, April 7, 2014

irish beer bread with cheese, dill and BACON

So this one will be short cause I'm on the road in a hotel typing on my phone (which is a pain in the butt when your phones auto correct doesn't recognize words like irish. Or butt.) But I promised I wouldn't be behind on posts again so here goes! For St paddys day most people celebrate by drinking, and I celebrate with cooking. This year I made corned beef and cabbage, Baileys and beer cupcakes and... irish beer bread with bacon (among other things). It was delicious, no one made it to my party but I am vouching for this recipe! It stayed moist and the flavors were awesome, the little flecks of bacon and cheese, yum! It's not difficult either so no worries about that aspect :) here we go!

Irish beer bread with cheddar bacon and dill


  • 3 cups all purpose flour
  • 1/4 cup sugar
  • 1 t salt
  • 1 T baking powder
  • 12 oz of your favorite beer at room temp
  • 1 cup shredded extra sharp cheddar cheese
  • 2 T fresh dill
  • 1/2 cup cooked bacon crumbles
  • 3 T butter, melted
Preheat the oven to 350 and mix the first 4 ingredients in a bowl. Using a rubber spatula, mix in the beer to combine and then add the cheese, bacon and dill. Scrape the batter into a greased loaf pan and top with the melted cheese. Bake for 50-60 minutes or until a toothpick in the center comes out clean. Enjoy! Even better warm :)

Sunday, April 6, 2014

Bacon cheese bombs!

BOOM! Finally I'm back on time and that deserves a lil celebration, so I thought this recipe would do nicely. Little crunchy explosions of fried cheese and crispy bacon in your mouth, like little fireworks of awesomeness. After trying it out I'll admit I was a bit disappointed. The breading didn't seem to want to hold the cheese in and as such I ended up losing most of it in the oil, but they were still tasty little bundles of bacon and biscuit. I might mess around with it sometime, maybe try with a normal mozzarella stick breading rather than the biscuit, but for now, this was quick, easy and went over fairly well :) Try experimenting with the different cheeses, the breading, etc. If you do, let me know how it is! And with that, here is the recipe.

Cheesy Bacon Bombs 


  • 1 can (8ct.) Pillsbury Grands Flaky Layers Biscuits
  • Cubed Mozzarella Cheese (1-1″ cube per Bomb)
  • 2 lbs. of Bacon (1 slice per Bomb)
  • Sticks (toothpicks, skewers, etc.)
  • Oil for frying (I used Canola)

Cube up the cheese and cut the biscuits into fourths, wrapping the cheese cubes in the biscuit bits. Roll it up nice and tight, and then wrap it in bacon and secure it with a skewer. It's easy, get an assembly line going! Heat approximately 2 inches of oil in a large pot to roughly 350 F and fry them in smaller batches, so as not to lower the temperature of the oil too fast. Drain them on some paper towels and serve them warm so the cheese is still lovely and ooey and gooey. Yum!

I swear it's the last time I'll be late!

Wow I had no clue I was 2 days behind, I swear I had caught up better than that. As you can all see I suck at deadlines! So I guess I have two more posts to put up today. I saved this recipe for a special occasion, and I suppose this fits it to make up for my grievous mistake, hopefully this helps!
So this recipe, the ace up my sleeve, is Bacon Double Cheeseburger Beer Cheese Soup. I know, lots of wonderful words squished together in one recipe, too good to be true right? You'll think so when you try this. I was skeptical, the ingredients are so simple, it's so easy, it might be good but could it be THAT good? Yes, it could. It's like crack soup. I tasted a little while cooking it and could not stop myself from eating it the rest of the time. Anyone else who's tried it agrees with me and I hope you will too! Easy to make for parties, company and I guarantee you it'll be a hit, especially among bacon lovers. There is just so much bacon in it, and the bacon flavor permeates the entire soup. It's like the holy grail of soups. No hidden secrets here, this one is easy, you could do it with the kids :) Feel free to mess with it, add your favorite cheeseburger toppings on top or mixed in. I'd probably do some sauteed onions and mushrooms next time diced up in it, and top it with some fresh tomato, croutons, diced pickles, bacon... maybe even some mayo (I lived in the south for a while, everything is better with mayo) mmmm

Bacon Double Cheeseburger Beer Cheese Soup


  • 12 ounces thick cut bacon, uncooked
  • 1 pound lean ground beef
  • ¼ cup all-purpose flour
  • 2 tablespoons Montreal steak seasoning 
  • 2 teaspoons smoked paprika
  • 1 (12 ounce) beer (I used Blue Moon)
  • 4 cups half and half 
  • 16 ounces mild cheddar cheese, shredded 
  • croutons, pickles, bacon bits (optional garnishes)

Warm a large pot over high heat, and using kitchen scissors cut the bacon into the pot (roughly 1/4 inch-1/2 inch sizes, you want bacon bit sorts sizes when you're done). Cook, stirring occasionally until lightly crisp, and then add the ground beef. Break it up and cook it through, when it's done you're going to want to drain as much of the drippings as you can, you don't want a super oily soup. Don't drain it all out, keep probably 2 Tablespoons in it, you want that bacon flavor to soak into the cheese and half and half still. When that's done, stir in the flour and seasonings until the flour has coated all the meat. Add the beer and cook for 3 minutes, scraping up all the little bits off the bottom as you do, don't want to let any bacon flavors go to waste! Then add the half and half, stir it in and bring it til it's bubbling. Add the cheese and stir it in til it's melted, and finally allow it to simmer, stirring occasionally until you're ready to serve. The longer you let it simmer the better those flavors are going to just invade the entire soup, but it's still amazing right when it's done. Enjoy!

Late again - Bacon Cinnamon Rolls

What better way to wake up on Sunday morning than with some bacon an cinnamon rolls? Or, even better... all in one delicious salty sweet crunchy gooey bite!
I'd seen this recipe kicking around Pinterest a lot and was curious, had to try it out. It was delicious, went over great with everyone! While I personally would probably still prefer to eat them separately, other people liked it better this way. A few tips, it's very important to get the pillsbury grands cinnamon rolls, the one with 5 in a pack, any other one and the numbers won't quite work out, and some aren't the right size. You can make it work, but it'll be much more difficult. And second, make sure to precook the bacon. You can get it fairly crispy and it'll still work, but just don't over cook it. This is the easy way, you could do it with your own cinnamon roll recipe but I was feeling lazy this weekend.

Alright, on to the recipe!

Bacon Cinnamon Rolls


  • 1 can pillsbury grands! cinnamon rolls with cream cheese icing
  • 10 strips of bacon

Preheat the oven to 350 F and cook the bacon on the stove top until your desired done-ness. Anywhere between lightly done and starting to get crispy, when done pat dry with paper towels to remove the grease. Separate dough into the rolls and unroll, laying the still warm, strips of bacon onto the cinnamon rolls and roll back up into cinnamon roll form, 2 strips of bacon to a roll for the right size. Place in a greased 8 or 9 inch round pan and bake for 25-29 minutes or until golden brown. Top with the icing and serve!

Thursday, April 3, 2014

Would you like some salad with your bacon?

One of the recipes I'd always been curious about but never tried myself, was warm bacon dressing. Seen it on iron chef, cooking shows, heard about it, and for some reason despite me LOVING bacon (can't you tell yet?) I had never tried it. I was determined to use this month as the perfect excuse to indulge in all my bacon fantasies, think willy wonka's factory but with bacon. No visions of sugar plums here, but of bacon, thick cut, maple, smoked, peppered, salty crispy goodness. Well to get back on track, I finally got to try out this dressing and it was amazing (like I ever doubted that). It adds just the right amount of bacon, paired with shallots and oil and vinegar which I think has turned it into one of my favorite dressings of all time. I am a huge fan of homemade salad dressings which just made this that much better. It is wonderful served warm, wilts the salad just a bit and you just have to try it for yourself and see. Well, enough of that, recipe time!

Warm Bacon Dressing 


  • 3 slices uncooked bacon, cut into 1/2 inch pieces
  • 2 T minced shallot 
  • 2 T water
  • 2 T white wine vinegar
  • 1 T olive oil
  • 1/2 t salt
  • 1/8 t black pepper
Cook the bacon in a frying pan over medium heat until browned and crisp, stirring frequently. This is one of my favorite ways to cook bacon, it just ends up lil nuggets of awesome bacony-ness. It'll take about 7 minutes give or take, remove with a slotted spoon onto a paper towel lined plate and drain out all but 1Tablespoon of the bacon drippings. Add the remaining ingredients to the pan, stir to blend and then stir in the bacon bits, and voila you're done! It says it yields about enough for 12 cups of loosely packed lettuce, but lets face it, most of us would just drink this straight so I don't give that number any credence in my house. Now it is ready to drizzle all over your healthy veggies and make them just a lil less healthy. Or go ahead and just drink it straight, I won't tell. 

Day 2 - the sweet side of bacon

Alright, a day late but I'll double up on posts today. So I promised candied bacon and I have delivered. I decided to try a few different ways, and I'll go through how they were and the opinions on them. First off, when doing candied bacon, always bake it, and preferably bake it on a baking rack. I'm visiting friends and they don't have one so I ended up using the tin foil method. Worked alright, but it ends up a lot more sticky and gooey than I prefer for my candied bacon. Alright, so the first two ways, were just with brown sugar. I used a ton of brown sugar on both sides on one, and a lighter amount of brown sugar on both sides of the other. Both were decent, but the general consensus was that the lighter amount let more bacon flavor come through and was better. It also wasn't as cloyingly sweet.
The second way, was in this syrup/brown sugar/ mustard mixture, which gave it a bit of sweet and spicy and was really good. It was sort of difficult to work with however, as it's so thick and sticky that coating the bacon in it was difficult. I did that in two different amounts as well, but by the end of the baking process you couldn't really tell a difference cause it all just oozed all over. It was tasty though, a taste similar to honey roasted peanuts, and this is a recipe we'll be going back for, to make some other goodies like bacon chocolate chip cookies and such. I'll try the baking rack method too next time and give you an update on how much better that went.
Note: We used maple bacon, which added to the sweetness. If you were to use a thicker cut, peppery bacon, it'd be a whole different story, but if you do, let me know how it goes! That is my personal favorite kind of bacon.

And on to the recipes!

For the brown sugar bacon, not really a recipe needed. just sprinkle some on, depending on how sweet you want it, on both sides. For the super brown sugar one I hid the entirety of the bacon in brown sugar (I love sugar and sweet stuff mmkay?) the other one was a lighter sprinkle over it. Then just lay it on the sheet pan or baking rack and bake at 350 for around 15-20 minutes. If you don't use the baking rack be careful! It really stiffens up after you take it out, so you don't need to have it super crispy or it'll start to burn with all of that sugar.

Now, for the syrupy one. There is an exact recipe but I usually just sorta guess. Don't want a lot of spicy? cut down on those ingredients. Want more? then add more, play with it, have fun. But I'll give you the measurements here in case you wanna go by the book (I just didn't want to candy 1 lb of bacon!)
 1lb good quality sliced bacon
2 T pure maple syrup (they recommended against pancake syrup, I used it and had no problems, wasn't going to splurge on special syrup for bacon)
1/4 cup brown sugar
2 t dijon mustard
1/2 t kosher salt
1/4 t cayenne pepper

Mix all the ingredients together in a bowl, and then add the bacon, mixing with your hands to get the best coverage. It's not going to cover it completely and it's going to seem a bit dry but that's how it's supposed to be. If you want more, make more of the mixture. Lay it out on the baking sheet and let it bake for 15-20 minutes, it should get very crispy, but if you don't have the baking rack don't worry about it because it won't get THAT crispy without it. Well enjoy! Try different combinations, let me know how it goes, experiment :) I only used a few slices of bacon at a time so if something didn't turn out I didn't waste the whole batch. Have a recipe to share? Comment and let me know :)

Tuesday, April 1, 2014

30 days of bacon kick off!

So I'd been wanting to kick start this blog back up, but was struggling through a few different ideas. In the end I decided to go with bacon! Who doesn't like bacon? Bacon recipes flood every online place from pinterest to facebook, from the normal to the insane. So I thought, why not try some of these out? I went through and compiled some lists from the savory to the sweet to the crazy out there ones, and challenged myself to do 30 days worth of the recipes, so here goes!

To start off with, I wanted something fairly simple, different ways to cook bacon. Typically, in my family, we would just cook it on a stove top, but I'd seen things for frying and baking that I wanted to try out! There were two different ways to bake the bacon. One is lifting it off the cooking surface, which definitely reduces the amount of grease, and gets you crisper bacon, however it doesn't really keep that bacony- look or texture, it ends up really flat, straight and fairly dry
. If you want a healthier version, try that! If you just want a quick easy way to cook bacon, I'd suggest the other baking method. This one you line a baking sheet for easy clean up, and the bacon has the chance to sorta wrinkle up and stays nice and moist. Also watch your baking times like crazy! I went on the short end of them and ended up overcooking it. Make sure you check it every couple minutes. Finally, there's deep frying. Definitely not the healthy version, but man does it make some crispy flavorful bacon! Best way to do that is to thread it on a skewer so it holds some shape and submerge it for only a minute or two. No special recipe for that one, so this is all I'll have for it, I don't have a picture either. My favorite method would have to be the second baking one I'd say, I personally don't like terribly crisp bacon.

Alright, so for the kind of recipes. The first method requires a baking rack, that you place on top of a baking sheet and lay your bacon on. Then you simply pop it in the oven for roughly 15-20 minutes at 325. But remember, check it often! Nothing worse than burnt bacon :(

The second method you can use tin foil or parchment paper. I feel like tin foil produces better results but that's partly cause I hate buying parchment paper cause I so infrequently use it! This time, put it in the oven at 375 for 15-20. Lean towards the shorter cooking time and check frequently! I hope this has helped a little, and here is a picture to show you what I mean on how the bacon turns out, left is the baking rack, right is the tin foil :) Good luck with your bacon adventures and I hope you check back for more of mine!


Tomorrow: Candied bacon - We started savory, going sweet tomorrow!

Tuesday, March 26, 2013

Colorado-bound

This week was sort of a rushed mash of dinners, hence the late blog post. My sister is currently visiting us, and we found out recently that we will be moving to Colorado sometime in the next 2 months, so between company and attempting to put together everything for the move and get the house ready we've been a bit busy and preoccupied. Whenever we have company though, I always try to make new recipes and try new meals, so I was still able to fit in a few meals, and both were a hit! The first one was the baked chicken taquitos, the recipe I had for it was originally an appetizer, but paired with some spanish rice it made a great meal and everyone loved it. The second was Chicken Taco Chili, which turned out a bit more soupy than I normally like, but when you serve it over rice the rice soaks all the liquid up and it's really good. The recipe makes a ton though, we've had it for 2 dinners so far and have enough to have it for another dinner, but I love recipes that end up surprising me with how many it will feed. I didn't intend for this post to have a tex-mex sort of feel to it, but it ended up happening anyways! Hope you enjoy the recipes, and I apologize for the lack of photos. :)

Baked Chicken Taquitos

• 3 ounces cream cheese, softened
• 1/4 cup salsa (green or red)
• 1 tablespoon fresh lime juice
• 1/2 teaspoon ground cumin
• 1/2 teaspoon chili powder
• 1/2 teaspoon onion powder
• 2 cloves garlic, minced
• 3 tablespoons chopped parsley
• 2 scallions, chopped
• 2 cups shredded cooked chicken
• 1 cup shredded pepper jack cheese
• 12 (6 inch) flour tortillas
• kosher salt
• cooking spray


Preheat your oven to 425 degrees. Line a baking sheet with a silpat matte or foil lightly coated with cooking spray. In a large bowl, combine all the ingredients (except the tortillas.) Working with a few tortillas at a time, heat them in the microwave between two paper towels until they are soft enough to roll (about 20 – 30 seconds). Spoon 2-3 tablespoons of the chicken mixture onto the lower third of a tortilla. Roll the tortilla as tightly as you can. Place the rolled tortilla seam side down on the baking sheet. Repeat with remaining tortillas until the mixture is gone, making sure the taquitos are not touching each other. Spray the tops lightly with cooking spray and sprinkle with kosher salt (don’t skip the salt!) Bake for 20-25 minutes or until crisp and golden. Serve with salsa, sour cream or guacamole.


Crock Pot Chicken Taco Chili

  • 1 onion, chopped 
  • 1 16-oz can black beans 
  • 1 16-oz can kidney beans 
  • 1 8-oz can tomato sauce
  • 10 oz package frozen corn kernels 
  • 2 14.5-oz cans diced tomatoes w/chilies 
  • 1 packet taco seasoning 
  • 1 tbsp cumin 
  • 1 tbsp chili powder 
  • 24 0z. (3) boneless skinless chicken breasts 
  • chili peppers, chopped (optional)
  • chopped fresh cilantro 

Combine beans, onion, chili peppers, corn, tomato sauce, cumin, chili powder and taco seasoning in a slow cooker. Place chicken on top and cover. Cook on low for 10 hours or on high for 6 hours. Half hour before serving, remove chicken and shred. Return chicken to slow cooker and stir in. Top with fresh cilantro. Also try it with low fat cheese and sour cream (extra points).

Sunday, March 17, 2013

Visitors!


This week my sister came to visit, and as we were having company I decided to try some fun new recipes I'd been waiting to try. The first was a frozen hot chocolate, which was great as it's just started to warm up here. Sadly we weren't quite patient enough for the ice to freeze and so we just ate them old rather than frozen, but it was still delicious! The other recipe is something that had been hanging around my pinterest account for a while, and fit great because I had to work and didn't want to have to rely on frozen pizzas too many time. So I went the slow cooker route and made honey sesame chicken in my crock pot. It turned out great as well and we'll definitely have to be having it again sometime! As far as the contest goes we didn't have many entries so there isn't really much need for any wait, so I'll be getting those cookbooks sent out today :) Enjoy the recipes and thanks to everyone who shared this blog!

Frozen Hot Chocolate


  • 3 tablespoons granulated sugar
  • 3 tablespoons (1 packet) hot cocoa mix
  • 2 tablespoons unsalted butter
  • 1/3 cup semi-sweet chocolate chips
  • 1/3 cup white chocolate chips
  • 1 can (12 oz) evaporated milk, divided
  • 4½ cups ice cubes
  • whipped cream

Combine sugar, cocoa mix, and butter in top of double boiler that is set over gently boiling water (a bowl set over a pot of boiling water will work just as well, so long as it sits close enough to the water). Stir often until melted and smooth paste forms. Add semi-sweet & white chocolate chips; stir. When chips begin to melt, slowly stir in 1/2 cup evaporated milk. Stir until smooth and velvety. Cool to room temperature. Combine chocolate base mixture, remaining evaporated milk and ice in blender (in batches, if necessary); cover. Blend until smooth. Pour into individual glasses. Top each with whipped cream. Sprinkle with additional chopped chocolate chips & mini marshmallows, if desired. Serve with a straw and spoon.


Crock Pot Honey Sesame Chicken


  • 6-8 boneless, skinless chicken thighs or 4 chicken breasts
  • Salt and pepper
  • 1/2 cup diced onion
  • 2 cloves garlic, minced
  • 1/2 cup honey
  • 1/4 cup ketchup
  • 1/2 cup low-sodium soy sauce
  • 2 tablespoons vegetable oil or olive oil
  • 1/4 teaspoon red pepper flakes
  • 4 teaspoons cornstarch
  • 1/3 cup water
  • 2 packets minute rice, optional
  • 1/2 tablespoon (or more) sesame seeds
  • 3 scallions, chopped


Place chicken in Crock Pot and lightly season both sides with salt and pepper. In a medium bowl, combine onion, garlic, honey, ketchup, soy sauce, oil and red pepper flakes. Pour over chicken. Cook on low for 3-4 hours, or high for 2 hours. Remove chicken to a cutting board, leaving sauce. Shred chicken into bite-sized pieces; set aside. Prepare rice according to package instructions. In a small bowl, dissolve 4 teaspoons cornstarch in 1/3 cup water; add to crock pot. Stir to combine with sauce. Cover and cook sauce on high for ten more minutes, or until slightly thickened. Add cooked rice to 4 plates, top with chicken and spoon sauce over top. Sprinkle evenly with sesame seeds and chopped scallions.

Sunday, March 10, 2013

Pampered Chef Recipe (and contest of sorts)

Last weekend I had a pampered chef party, it was great, even though many people didn't show up we had a great time and I got to try a new great recipe which I decided to share with everyone here! I'll get to that in just a minute though, I used to be a pampered chef consultant, and even though I got out of it, I still have a bunch of their old recipe books sitting around the house, and I love them! Each one has a small selection of appetizers, entrees and desserts, and every one I've tried has turned out pretty great. The books are only $2 a piece, and really handy to have, I've even used some in place of cards for some of the cooks in my life before! (if you're interested in the recipes they might have, scroll to the bottom for how you can get a digital copy of some) I have an open pampered chef party going online right now, and if you're interested in taking a look or ordering anything just follow this link.   Now that I've gotten that shameless plug out of the way, on to the recipe! My pampered chef consultant made German Chocolate Lava Cake in the microwave! The recipe calls for one of their products, which is a small covered baker. It's pretty great (but a little pricey, so any microwave safe dish with a lid should work) and looks wonderful, so transfers straight from the microwave to the table to serve. Sorry I don't have any pictures to go with this, I was too busy entertaining :) Hope you enjoy it! I also have a little contest of sorts,

German Chocolate Lava Cake


  • 2/3 cup sweetened flaked coconut
  • 2 t canola oil
  • 1/4 cup chopped pecans
  • 1 can sweetened condensed milk
  • 1 (9 oz) small package devils food cake mix
  • 1/3 cup sour cream
  • 1 egg
  • 1/4 cup semi sweet chocolate morsels

Microwave coconut in uncovered baker on high for 2-3 minutes or until golden brown, stirring every 30 seconds. Spread it out on a plate to cool. Brush same baker with oil. Mix pecans, half of the coconut and 1 cup of the condensed milk in a small bowl until blended. Mix cake mix, sour cream, remaining condensed milk and egg in a large bowl until blended. Pour batter into baker. Pour coconut mixture evenly over the batter. Microwave uncovered on high 3-5 minutes or until the center of the cake look moist (but not wet). Cover baker and let stand 5 minutes. Microwave chocolate in uncovered bowl on high 45-60 seconds or until almost melted. Stir until smooth. Pour melted chocolate into resealable plastic bag and trim the corner. Sprinkle cake with remaining coconut and drizzle with chocolate. Enjoy!
Note: Remember, not all microwaves cook at the same speeds, so if you're worried yours cooks too high or too low, just stop it a minute or so early and check the top just to be safe.


Contest Time!!!

Lately I've been scanning in a bunch of my pampered chef cookbooks, so I have them all on digital file right now, and I thought I would offer them up as an incentive to share about this blog with your friends. These are cookbooks that you won't be able to buy anywhere, as they're seasonal ones that pampered chef doesn't sell anymore. All you have to do is comment on this post with your email address and name, and share this blog with your friends, family, tweet, facebook, etc. and tell them to comment on any of the blog posts with the name of the person who sent them, and whoever has the most by the next blog post will get an email with all 3 digital cookbooks! The person with the second most comments will get 1 of the digital cookbooks sent to their email. Good luck!

Monday, February 25, 2013

Mash up

This week was just sort of a mash up of a recipe I'd been wanting to do for a little while, and a spur the moment one I saw Paula Deen making on tv and had a sudden craving for. They all turned out great, the soup was delicious and super easy, and the chocolate bread hit the chocolate craving I was having that day. Not much to say really this week, so I'll just jump straight to the recipes, enjoy!


Zuppa Toscana copycat recipe (from olive garden)


  • 1 lb ground Italian sausage
  • 1½ tsp crushed red peppers
  • 1 large diced white onion
  • 4 Tbsp bacon pieces
  • 2 tsp garlic puree
  • 10 cups water
  • 5 cubes of chicken bouillon
  • 1 cup heavy cream
  • 1 lb sliced Russet potatoes, or about 3 large potatoes
  • ¼ of a bunch of kale (our grocery store didn't have kale so I threw in some sweet peas instead and it worked fine)
  • Optional: shredded parmesan cheese


Sauté Italian sausage and crushed red pepper in a large pot. Drain excess fat, refrigerate while you prepare other ingredients. In the same pan, sauté bacon, onions and garlic over low-medium heat for approximately 15 mins. or until the onions are soft. Add chicken bouillon and water to the pot and heat until it starts to boil. Add the sliced potatoes and cook until soft, about half an hour. Add the heavy cream and just cook until thoroughly heated. Stir in the sausage and the kale, let all heat through, garnish with parmesan cheese and serve. Delicious and super easy!

Chocolate Bread


  • Butter, for pans
  • 2 1/4 cups all-purpose flour
  • 2 cups sugar
  • 3/4 cup unsweetened cocoa powder
  • 1 1/2 teaspoons baking powder
  • 1/2 teaspoon salt
  • 1 1/2 cups milk
  • 1 cup vegetable oil
  • 3 large eggs
  • 1 teaspoon vanilla extract
  • 2 cups semisweet chocolate morsels
  • 1 1/2 cups chopped pecans

Preheat oven to 325 degrees F. Butter and flour (2) 9 by 5-inch loaf pans.

In a large bowl combine the flour, sugar, cocoa, baking powder, and salt. Beat in the milk, oil, eggs, and vanilla at medium-low speed with an electric mixer until combined. Beat in the chocolate morsels and pecans. Spoon the batter evenly into the prepared pans. Bake until a wooden pick inserted in center comes out clean, about 1 hour to 1 hour and 15 minutes. Shield the bread with aluminum foil to prevent excess browning. Let cool in the pans for 10 minutes. Remove the bread from the pans and cool completely on a wire rack.

Sunday, February 17, 2013

Valentines day

 This Valentine's Day was something I had been scheming together for quite a while now. In the 4 years since my husband and I started dating we have only spent one Valentine's day together, and that was only a week or two after we got married and was not very largely celebrated as we had just come back from our honeymoon. Between long distance dating, basic training and field exercises, we've never really gotten to go all out for a valentine's day, but this year I decided to change that. Starting weeks in advance, I started planning up a menu, thinking up decorations and the lead up to it. The 13 days leading up to it I surprised him with a little treat each day with a cheesy quote on it "I'm nuts about you" "Beer my valentine?" and they only got worse as the days went on. Then I made up our living room like an elementary schoolroom, we're talking pink, red, and purple hearts all over the place. Since my husband had to work most of the day, I didn't plan too much (and he told me after dinner he something planned) so after all of that, I just focused on an awesome meal. Chocolate covered strawberries as an appetizer of sorts, rib eye steaks cooked to perfection (for us, that means rare!) paired with roasted cauliflower with parmesan and finished off with mini strawberry pies. It all turned out delicious! If you haven't cooked steaks very often and are particular, a few little hints to remember, first of it will continue to cook a little even after you take it off the pan, so if you don't like your steaks super dead remember, you can always cook it a lil longer, so take it out a bit early! There are three different ways to check how done your steak is, the worst way is cutting into it, a decent way is to use a thermometer, but if you don't have one, another good way is the finger test, which is explained here: http://www.simplyrecipes.com/recipes/the_finger_test_to_check_the_doneness_of_meat/ and last but not least, two of the most important (but often forgotten) things are to let it come to room temperature before cooking, and to let it rest when it is done the full time. Steaks are something I'm always worried that I will mess up as it can be such an expensive cut of meat, but you'll only get better with practice :) Hopefully my tips help, and I hope you all had a great valentine's day! (I didn't get many pictures of the actual meal because we were so hungry and just dug in)

Chocolate Covered Strawberries


  • 16 ounces milk chocolate chips
  • 2 tablespoons shortening
  • 1 pound fresh strawberries with leaves
  • Optional: White or dark chocolate chips

In a double boiler, melt the chocolate and shortening, stirring occasionally until smooth. Holding them by the toothpicks, dip the strawberries into the chocolate mixture. Turn the strawberries upside down and insert the toothpick into styrofoam for the chocolate to cool, or lay on a sheet of parchment paper. You can drizzle with white or dark chocolate if you desire but they'll taste fine how they are!


Pan-Seared Rib-Eye


  • 1 boneless rib eye steak, 1 1/2 inches thick
  • Canola oil, to coat
  • Kosher salt and ground black pepper

Place a 10-to-12-inch cast-iron skillet in the oven and heat the oven to 500 degrees F. Bring the steak to room temperature. When the oven reaches temperature, remove the skillet and place on the range over high heat. Coat the steak lightly with oil and sprinkle both sides with a generous pinch of salt. Grind on black pepper. Immediately place the steak in the middle of the hot, dry skillet. Cook 30 seconds without moving. Turn with tongs and cook another 30 seconds, then put the pan straight into the oven for 2 minutes. Flip the steak and cook for another 2 minutes. (This time is for medium-rare steak, for our steaks I shortened the time a bit. If you prefer medium, add a minute to both of the oven turns.) Remove the steak from the skillet, cover loosely with foil and rest for 2 minutes. Serve whole or slice thin and fan onto plate.

Roasted Parmesan Cauliflower


  • 6 ounces cauliflower florets (1.5 cups)
  • 1/4 cup grated parmesan cheese
  • 1 teaspoon chopped fresh parsley
  • 1/4 teaspoon garlic powder
  • 1/4 teaspoon ground black pepper
  • salt
  • 1 teaspoon olive oil

Bring a large pot of water to a boil and add the cauliflour, boiling for about 5 minutes or until it starts to get tender. Drain and add the rest of the ingredients except olive oil. Toss. Drizzle on the oil. Toss. Put mixture into a small nonstick dish. Place into a 425°F preheated oven. Bake for 15 - 17 minutes; stir once. You want it to be lightly browned and tender. Serve.


Mini Strawberry Pies


  • 1 roll Pre-made refrigerated pie dough (Or you can use homemade)
  • 2 oz cream cheese
  • sprinkle of sugar
  • 1 cup diced strawberries
  • Optional: Hot fudge sauce, whipped cream.
Preheat the oven to 225 F Using a heart shaped cookie cutter, cut out as many pieces as you can, after rerolling a few times I got enough to make 4 mini pies. Top one with strawberry, sprinkled sugar and cream cheese and then another one of the hearts, sealing the edges with a fork. Prick the middle of each one once with a fork. Bake for 12 minutes or until golden brown. Garnish with hot fudge sauce and whipped cream and serve.


Sunday, February 10, 2013

Mini Cheesecakes

Last week slipped by me and I barely realized it until a while later, and I was determined not to let this week do the same thing. This week was pretty busy as well with all of the things we needed to do to get ready for the military ball we had this weekend (which was amazing), but about halfway through the week I got this crazy strong urge to do some baking, and this recipe was something I'd been wanting to try for a while. My husband is a huge fan of pumpkin pie, and I like to mess around with it just a bit and put that flavor into other fun things, so I decided to make Mini Pumpkin Pie Frosted Cinnamon Cheesecakes. They were amazing, they didn't look the greatest so I did not get a good picture to share, (note, when you frost them either do it with a knife or a star tip, not a round tip!) but everyone loved them, I even brought some to work to share with my coworkers and they liked them too. Here's the recipe and I hope you enjoy them too :)


Mini Pumpkin Pie Frosted Cinnamon Cheesecakes


  • 1 cup graham cracker crumbs
  • 1/4 cup unsalted butter, melted
  • 1 pinch salt
  • 16 ounces cream cheese, room temperature
  • 1/2 cup granulated sugar
  • 2 tablespoons granulated sugar
  • 2 large eggs, room temperature
  • 1/3 cup heavy cream
  • 1/2 tablespoon pure vanilla extract
  • 1 tablespoon ground cinnamon
  • 1 (15 ounce) can pumpkin puree
  • 3/4 cup brown sugar, packed
  • 1/4 teaspoon salt
  • 1 1/2 teaspoons pumpkin pie spice
  • 2 eggs
  • 1/2 cup evaporated milk
  • 1/2 cup heavy cream


Preheat oven to 350 degrees and prepare 12 baking cups with paper liners. In a separate bowl, whisk together the first three ingredients until well blended. Scoop 1 packed tablespoon of crust into each baking cup, and press down to pack firm. Bake for 10 minutes at 350 degrees, then remove and set aside.
Preheat oven to 325 degrees F. Begin to boil a large kettle or pot of water for the water bath (if you have a pan large enough for the cupcake tin to sit in follow this step, it will help the cheesecakes cook more evenly and not dry out, if not though, don't worry about it. I didn't have one and they still turned out great).
In the bowl of your stand mixer fitted with a paddle attachment (or you could use a hand mixer) combine the cream cheese and 1/2 cup plus 2 T. sugar, then mix on medium-speed until smooth. Add eggs, one at a time, fully incorporating each before adding the next. Make sure to scrape down the bowl in between each egg. Add heavy cream, vanilla and cinnamon, and mix until smooth. Pour batter into each crust-prepared baking cup until 3/4 full.
Once your kettle or pot of water is boiling, carefully place a large baking dish on the lower rack of your oven and pull the rack out a few inches towards you, and then pour the water into it. This will create a water bath that will give off lots of steam while the cheesecake bakes.
Then place the cheesecake pan in the oven, and bake for about 25 minutes, or until the edges appear to be set and the center still has a slight jiggle to it. Turn off the oven and open the oven door slightly for 5 minutes. Then remove the pan and place on a cooling rack until completely cooled. Top with pumpkin pie frosting.

For the pumpkin pie frosting: Preheat oven to 425 degrees. In a mixing bowl, whisk together all ingredients until well blended. Pour into a greased 9-inch pie pan and bake for 30-40 minutes, or until a toothpick inserted into the center of the pie comes out clean. Remove and let cool, then refrigerate.
When ready to "frost" the cheesecakes, remove the pumpkin pie and spoon the filling into a piping bag. Use as you would regular frosting.

Sunday, January 27, 2013

Anniversary Dinner

Last week my husband and I celebrated our 3rd anniversary, and rather than going out somewhere and spending tons of money we decided to continue a tradition we started the year before trading off on who cooks the meal. Last year, my husband surprised me when I came home from work on our anniversary with a meal I had been planning on cooking already made. This year I decided to try a recipe we had in a restaurant in disney world that we both greatly enjoyed, braised lamb shanks. Along with that I made a red wine reduction and parmesan polenta (which actually turned out great this time, no lumps!). For dessert I did red velvet cheesecake brownies from a previous post, which ended up being blue cause I was out of red food coloring! The polenta and brownies were already posted so I'll just be sharing the lamb shanks and red wine reduction recipes tonight. It may sound difficult and while it's not exactly a beginners recipe, it's still rather simple and it tastes great. Lamb is a bit more expensive and difficult to find, but it is one of my husbands favorite foods, so it's definitely worth it for special occasions. Enjoy :)


Braised Lamb Shanks


  • Extra-virgin olive oil
  • 4 lamb shanks (each about 1 1/4 pounds; 1 shank is a portion)
  • Kosher salt
  • 1 large Spanish onion or 2 small yellow onions, cut into 1-inch dice
  • 3 carrots, peeled and cut into 1/2-inch dice
  • 3 celery ribs, cut into 1/2-inch dice
  • 4 cloves garlic
  • 1 (12-ounce) can tomato paste
  • 2 cups hearty red wine
  • 2 tablespoons finely chopped rosemary leaves
  • 10 to 12 thyme branches tied together in a bundle
  • 3 to 4 cups water
  • 4 bay leaves

Preheat the oven to 400 degrees F. Coat a large oven safe pot generously with olive oil and bring to a medium heat. Season the shanks generously with salt and add them to the pan. Brown well on all sides, it might go quickly so keep an eye on it while you puree the veggies. Meanwhile, puree the onions, carrots, celery and garlic in a food processor until it becomes a coarse paste. Remove and set aside.

Remove the shanks from the pan to a sheet tray. Discard the excess fat from the pan. Add a little more oil to coat the bottom of the pan and add the pureed veggies. Season with salt, to taste. Saute the veggies until they are very brown and aromatic, about 10-15 minutes. Take care not to let it get too brown. Add the tomato paste and brown for 5 minutes. Stir in the wine, chopped rosemary and thyme bundle. Stir frequently and cook until the wine has reduced by about half.

Add the shanks back to the pot and pour in 3 to 4 cups of water. The shanks should be submersed, if they are not, add more water (I needed closer to 8-10 but it'll change depending on the size of your shanks)  Add the bay leaves to the pan, cover and put in the preheated oven. The cooking time will be about 2 1/2 to 3 hours. Turn the shanks over about halfway through the cooking time. Check the shanks every 45 minutes or so. If the liquid has reduced too much add more water. 

Remove the cover during the least 30 minutes for some extra browning. When the shanks are done the meat should be incredibly tender and flavorful. Serve on top of Parmesan Polenta and drizzle with the red wine reduction. Enjoy!


Red Wine Reduction

  • olive oil, for coating the pan
  • 1/4 cup shallots, minced
  • 1/2 cup red wine
  • 1/2 cup beef stock
  • 2 tablespoons butter

In a saute pan, over medium high heat, add enough olive oil to coat the pan. Add the shallots and cook until translucent. Add the red wine and the stock and reduce by half.* Add the butter.

*if you would like a smoother sauce you can strain the shallots out at this point then return to the pan and add the butter.

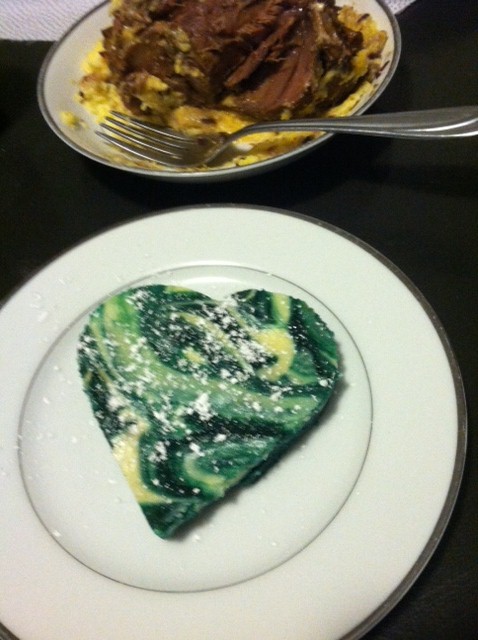
(no pictures of the wine reduction on it's own, so here's a picture of dessert! I used a cookie cutter in the pan and dusted it with powdered sugar)

Sunday, January 20, 2013

Pot Roast and leftovers

I thought I had already given my pot roast recipe, but try as I might as I look back over the posts I can't find it, so it'll be more like a bonus! This week I had a few things I wanted to talk about that aren't even related to cooking (I know, I'll keep it short) Lately on Pinterest I've been getting into a lot of home improvement things, finding out some things I wanted to share, first off being a cure for those nasty yellow armpit stains! Go here to see the recipe, but I can vouch for it as being awesome! Now I don't have to pass up those white shirts at goodwill cause of the stains, or throw out old shirts cause of it! The other thing I found out is that you're supposed to wash pillows, and apparently 3 times a year at that. I had no idea, I though you just tossed them when they got old enough :/ but now I have clean pillows! You can find a good way to do that here. And now, for the recipes. I love my pot roast recipe and my husband thinks it's amazing, it's always moist, flavorful and even the leftovers continue tasting great. It's super easy too, and if you make enough of it you can make what I made with our leftovers, which were Pot Roast Sliders. Also very easy and a fun way to redo the leftovers :) Enjoy!


Amazing Pot Roast (Sorry if it's a repeat!)


  • 1 packet gravy mix (any brand or type, I've used beef and turkey before)
  • 1 packet ranch dip mix
  • 1 packet dry onion soup mix
  • 2-3 pound roast
  • 1/2 cup water
Mix all of the dry mixes together and sprinkle on top of the roast in the crock pot. Pour the water along the side, not over the roast and cook on low for 4 hours or high for 6-8. The longer the more tender and more flavor will soak into it. 


Pot Roast Sliders
  • Pot Roast
  • Hawaiian rolls
  • Horseradish sauce
  • Swiss Cheese
Bake the rolls until they're golden brown, and layer the ingredients on the rolls. Enjoy! Be careful though, the horseradish can be quite hot if you're not used to it. Ranch dressing or mayonnaise would be good substitutes as well :)

Sunday, January 13, 2013

Eating out or eating in?

This week I decided to try a recipe my husband had pointed out as being interested in, Korean Bbq Beef Skewers, and at the last minute I paired them with some bacon wrapped asparagus on the grill, a recipe I already shared a while ago here. The skewers were surprisingly tasty, and if you've done some of the recipes before from the blog you might already have most of the ingredients around the house! After I had made these I took the time to think through all of the ingredients I had bought and how much it was as opposed to how much it would cost us if we had eaten out, and the results made me very happy. I got pretty much everything on sale: my steak, bacon and asparagus, and with drinks and such it was about $20 to make this meal that feeds 4. It is a little on the high side for the meals I usually make at home, but it was a great meal, and after figuring in the tip and drinks, if we would have eaten out something like this it would have cost somewhere around $60. It's not quite the same experience as going out to eat of course, but when money is tight and you want to still have a date night, a nice meal paired with a bottle of wine and some candles can do in a jiffy and save you money :) That's enough on that though, time for the recipe!


Korean BBQ Beef Kebabs


(yay! My photos are uploading normally again)

  • 1 1/2 lb. sirloin steak, cut against the grain into thin (about 1/4″) slices
  • 1/2 c. rice wine or pear juice (1 4 oz. bottle of pear juice from the baby food aisle is perfect and cheap)
  • 1/2 c. low-sodium soy sauce (I used regular soy sauce and thought the taste was fine)
  • 2 Tbsp. brown sugar
  • 2 Tbsp. minced garlic
  • 1 tsp. Sriracha chili sauce
  • 1 1/2 tsp. sesame oil

Combine wine or pear juice, soy sauce, brown sugar, garlic, chili sauce, and sesame oil in a large bowl. Add sliced steak. Marinate at room temperature for 1 hour or up to 8 hours in the refrigerator. Preheat the grill (or grill pan, in my case). While the grill is heating, thread the steak pieces onto (pre-soaked) bamboo skewers. Cook over medium-high heat for about 3-4 minutes per side, being careful not to let the meat get too cooked. If you like your meat more rare lean towards closer to 1-2 minutes, mine cooked very quickly. Serve immediately; serves 4-6.

(recipe from Our Best Bites )

Sunday, December 30, 2012

Merry Christmas and a Happy New Year!

With the holidays rushing up on us I didn't quite have a chance to do a blog post last sunday, so instead I have several recipes I'll share today as one large holiday post! This Christmas we decided to stay here rather than go home for the holidays, it's one of the less fun things about being a military family and having to choose between these things, but we do hope to make the rounds sometime next year. I worked a lot the week before so I hadn't had a chance to do any meals besides crock pot ones, and we did get to try out all of those crock pot meals from that post long ago. The verdict is that all but the teriyaki chicken were great, good flavor, veggies, and for our family made one and a half dinners per bag, but after a week of that I was itching to cook something myself. One thing my husband had been wanting since he got home was venison, and my boss's husband is a hunter and was nice enough to give us a good amount of venison meat to cook up some fun meals with. We got ground, sausage, stew meat and cubed steak. I decided to do one of my favorite dishes using one of my husbands favorites meats: Chicken fried venison steak with sawmill gravy. It turned out great, I had tried making this sort of gravy once before, but I had rushed it too much and it ended up being kinda off, this time it was amazing. To go along with it, my husband had been asking for some sort of a peach crumble, so I decided to do a peach dump cake. It is the easiest dessert I've ever made and it tasted pretty awesome, I might have to keep the ingredients around the house for emergency visitor desserts. So, without further adieu, the recipes.


Chicken Fried "Steak" and Sawmill Gravy


  • 1½ pounds top-round steak (or cubed steak, if you used the cubed skip to the step where you season it with salt and pepper)
  • 1½ cups all-purpose flour
  • 1 teaspoon kosher salt
  • 1 teaspoon black pepper
  • ½ teaspoon cayenne pepper
  • 3 eggs
  • ½ cup buttermilk
  • Vegetable oil, for frying
  • ¼ pound breakfast sausage
  • 2 tablespoons all-purpose flour
  • 1½ cups whole milk
  • Salt and black pepper, to taste

Cut the top-round steak into four pieces. Working with one piece at a time, place on a sturdy cutting board or clean counter-top, cover with a large piece of plastic wrap, and pound the beef with a meat tenderizer until flattened and almost doubled in size (you want the meat to be about ¼-inch thick). Repeat with the remaining pieces. Sprinkle pieces of beef with salt and black pepper. In a large, shallow bowl, whisk together the flour, salt, black pepper, and cayenne pepper. In another large, shallow bowl, whisk together the eggs and the buttermilk. Take a piece of the tenderized meat and dip it in the egg mixture. Next, place the meat in the bowl of seasoned flour. Turn to coat it thoroughly. Place the meat back into the egg mixture, turning to coat. Finally, return it back to the flour mixture, ensuring that it is evenly coated on both sides. Place on a clean baking sheet and repeat with the remaining pieces of meat. In a large, 12-inch skillet, heat ½ inch of vegetable oil over medium-high heat until a small fleck of flour dropped in the pan sizzles. Carefully place one or two pieces of the meat (whatever fits comfortably without overcrowding) into the skillet. Cook for 3 to 4 minutes, or until the blood starts bubbling out of the top of the steak. Using a pair of tongs, gently turn over the steaks and cook for 5 more minutes. Remove the steaks to a cooling rack to drain while you finish frying the remaining steaks. You can place the cooked steaks in a 200-degree oven to keep warm. Finally, make the sawmill gravy. (You can start this in another pan while the last piece of steak is cooking, or do like I did, make it ahead of time and right before the last steak is done cooking, heat it up and add a bit of milk to bring the moisture back to it) In a skillet over medium heat, cook the sausage until browned, crumbling it as it cooks. With a slotted spoon, remove the sausage from the skillet and place on a plate. Drain the oil from the pan, reserving 2 tablespoons in the skillet (if your sausage didn't yield enough drippings, you can use vegetable oil to get to the 2 tablespoons). Sprinkle the flour over the drippings, and whisk together, cooking for about 2 minutes. Add the milk slowly to the skillet, whisking continuously. Reduce the heat to medium-low and continue whisking until the mixture is thickened, about 5 more minutes (Keep going until it's a consistency you like). Remove from the heat, stir in the reserved sausage, and season to taste with salt and black pepper. (If the gravy is too thick, you can thin it by whisking in more milk, a tablespoon at a time.) Serve the steaks with the sawmill gravy poured over top. Next time I will double the gravy recipe because gravy is freaking amazing, and if you like it too I suggest you do the same!


Note: For the buttermilk I used my pre frozen cubes as I never use a full thing of buttermilk. If you have leftovers and want to save it, measure 2 tablespoons in each spot in an ice cube tray and freeze it. Once frozen, put in a zip lock bag and label with whats in it and how much in each cube and put back in the freezer. 4 TB in 1/4 cup and 8 in 1/2, so I used 4 cubes with this.


Peach Dump Cake

(I didn't get a picture of this, it disappeared too quickly!)

  • 24.5 oz jar of sliced peaches in light syrup (or use fresh)
  • 1 package yellow cake mix
  • 1 stick butter (1/2 cup), cut into 16 pieces
  • 1 cup brown sugar
  • 1/2 cup chopped walnuts (optional)
Preheat oven to 350 degrees F. Layer ingredients in a 13 X 9 dish, in order starting with the peaches. Bake for about 40 minutes. Serve warm or cold… with or without ice cream. See? Easy!